Dashboard Overview
The Dashboard Overview is the main landing screen of the DatabridgeCRM Restaurant Admin Panel. It gives administrators a central place to access all major restaurant management features from one interface.
This screen helps the admin quickly navigate to different operational modules such as Menu Management, Tables, Waiter Requests, Reservations, POS, Orders, Customers, Staff, Delivery Executives, Expenses, Payments, and Reports.
The dashboard is designed to simplify restaurant operations by placing all major controls in a structured left-side navigation panel. This allows the admin to move from one task to another without confusion and manage the entire restaurant workflow efficiently.
Main Purpose of Dashboard
The dashboard acts as the control center of the restaurant management system. From here, the admin can:
manage food menu and categories
organize table and area settings
handle customer orders
process POS billing
track staff and delivery executives
monitor payments and expenses
check sales and performance reports
Modules Visible in the Dashboard
Based on the screen, the following modules are available:
1. Dashboard
Used as the main home screen for quick navigation and operational overview.
2. Menu
Used to manage:
Menus
Menu Items
Item Categories
3. Tables
Used to manage:
Areas
Tables
QR Codes
4. Waiter Requests
Used to track and manage customer service requests raised from tables.
5. Reservations
Used to manage booking and reservation entries.
6. POS
Used for billing and point-of-sale operations.
7. Orders
Used to manage:
KOT
Orders
8. Customers
Used to maintain customer data and records.
9. Staff
Used to manage employee information and restaurant team access.
10. Delivery Executive
Used to manage delivery staff for order dispatch and delivery tracking.
11. Expenses
Used to manage:
Expenses
Expense Categories
12. Payments
Used to manage:
Payments
Due Payments
13. Reports
Used to check:
Sales Report
Item Report
Category Report
Delivery App Report
Expense Reports
Cancelled Order Report
Removed KOT Item Report
Tax Report
How This Screen Helps the Admin
This dashboard improves workflow by keeping all major modules in one place. The admin can start from setup features such as menu and tables, then move to daily operation features such as POS and orders, and finally review business performance through reports.
This makes the DatabridgeCRM Restaurant Admin Panel easy to use, structured, and efficient for complete restaurant management.
1
Login
2
Dashboard
3
Access Modules
4
Manage Operations
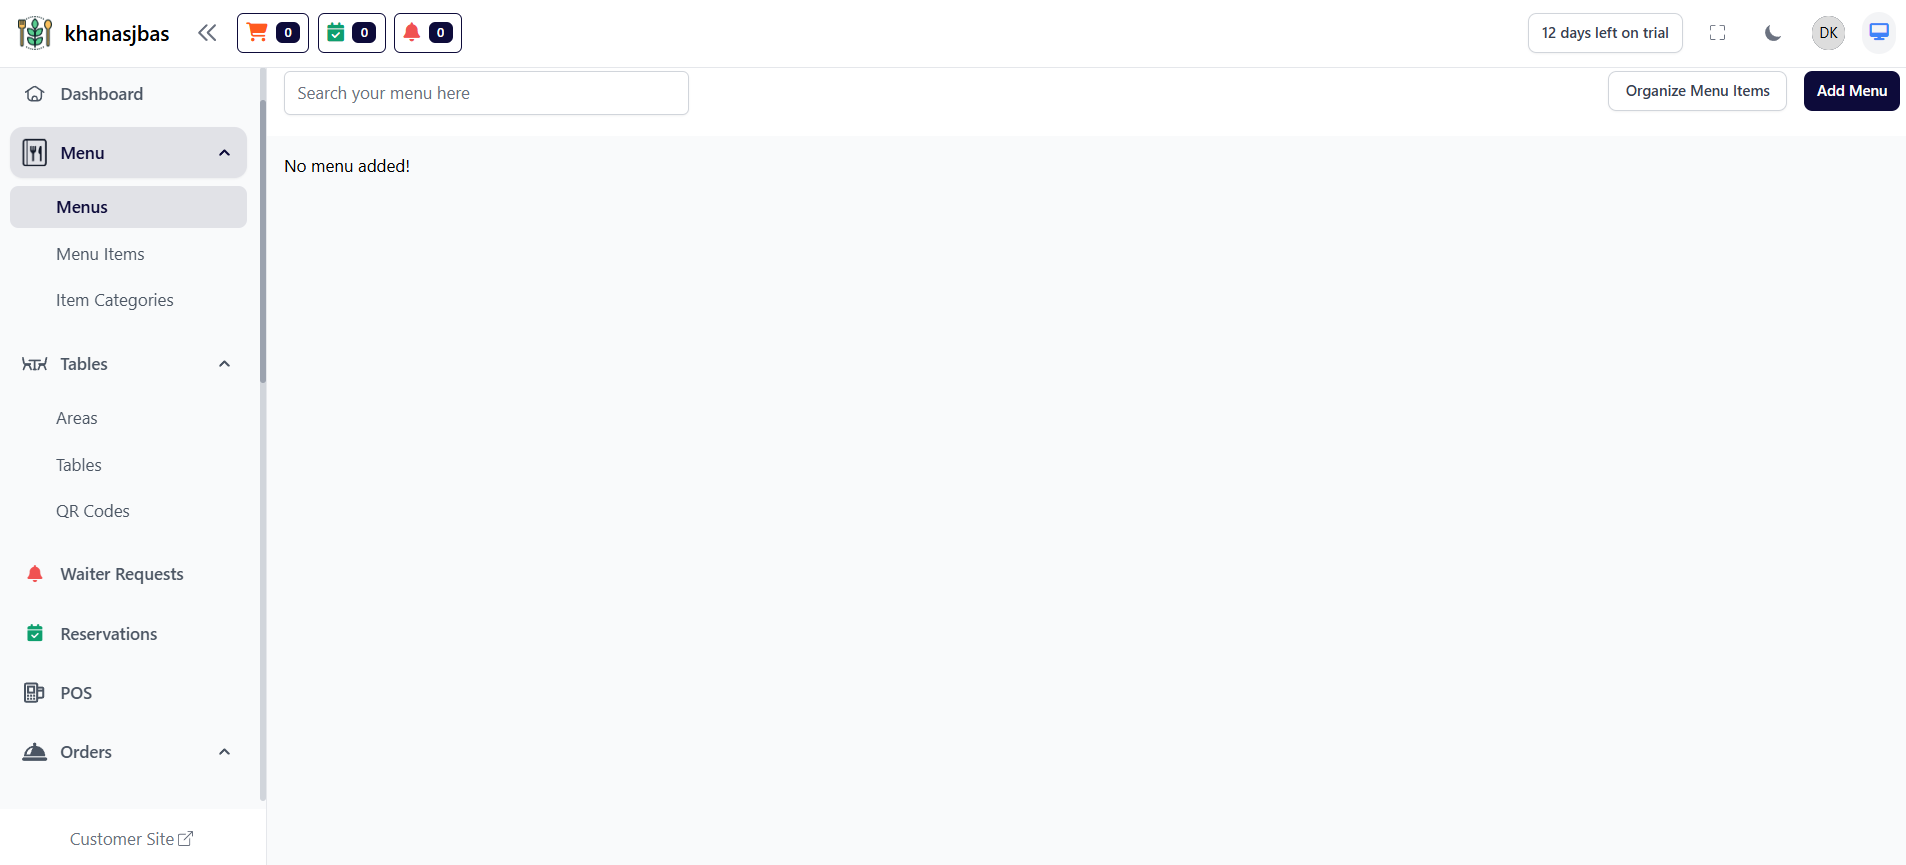
Menus (Create & Manage Menu Groups)
The Menus feature allows the admin to create different menu groups such as Breakfast, Lunch, Dinner, or specific categories like Burgers, Drinks, etc.
Each menu acts as a container that holds multiple menu items. This helps in organizing the food items in a structured and user-friendly way.
Admin can:
-Add new menus
-Update existing menus
-Delete menus
-Organize menu display
Menu Management
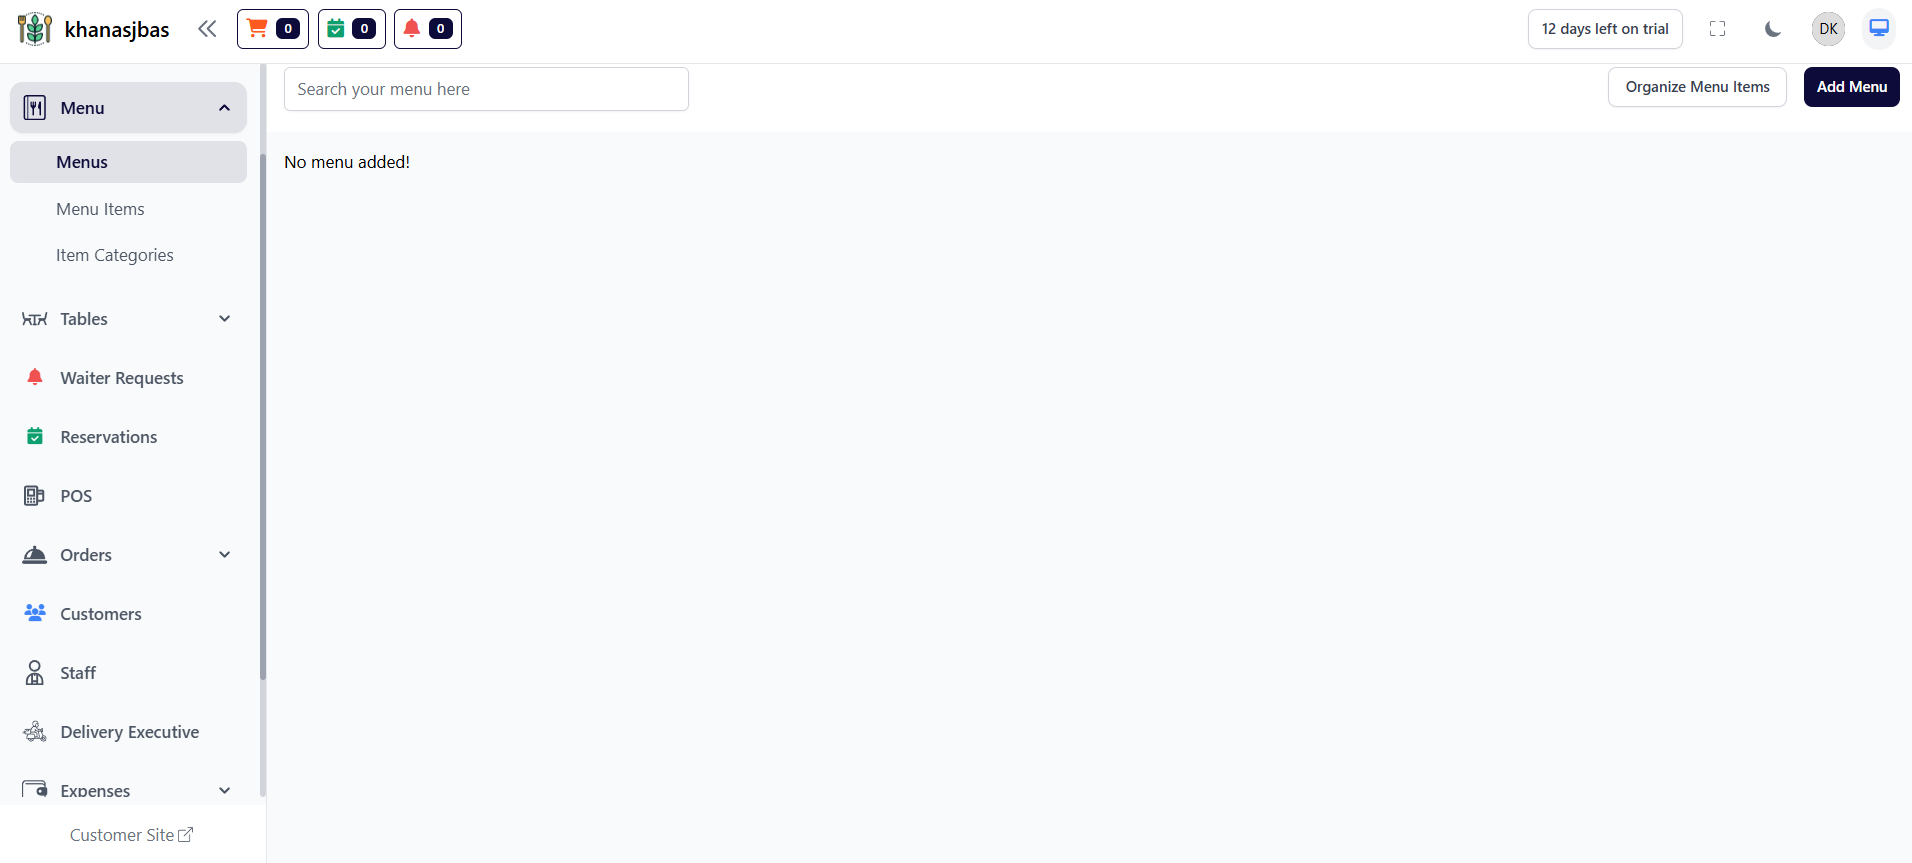
The Menu Management Module in DatabridgeCRM is used to manage the complete food structure of the restaurant. It allows the admin to create menus, add food items, organize categories, and control item availability and visibility.This module is essential for setting up the restaurant’s digital menu and ensuring that all items are properly structured for both admin operations and customer display.
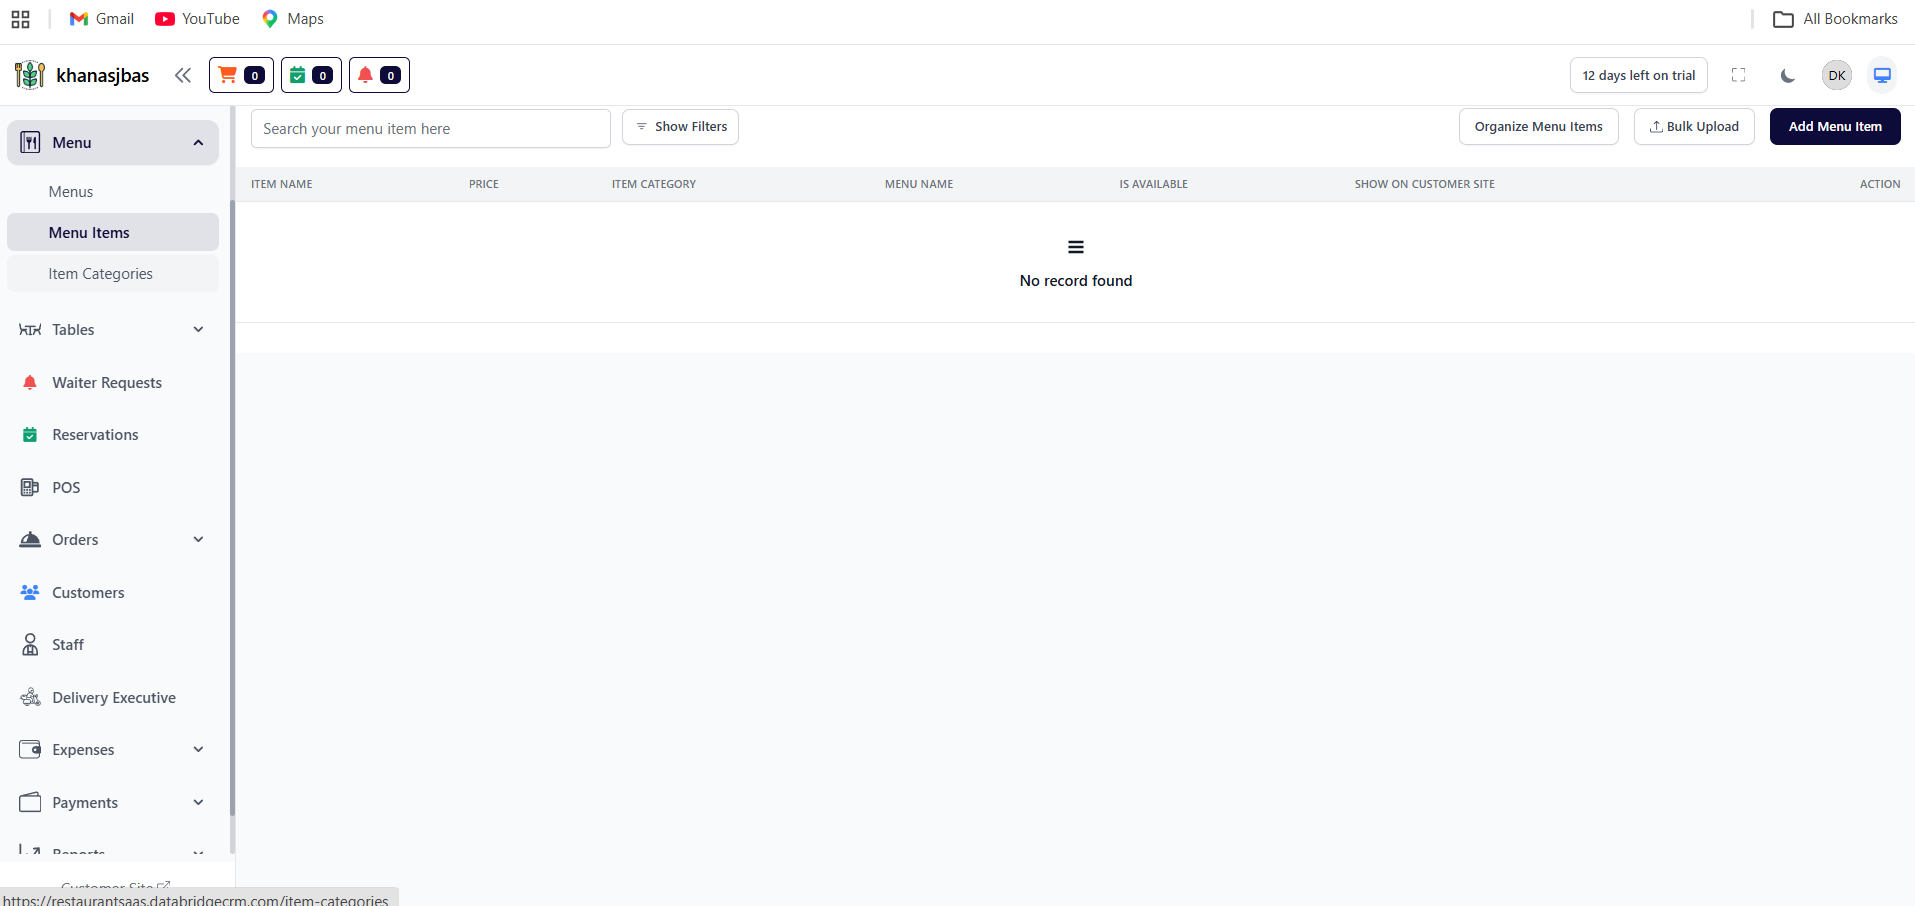
Menu Items
The Menu Items feature is used to add and manage all food items available in the restaurant.
From this section, admin can:
-Add new food items
-Set item price
-Assign category and menu
-Control availability (enable/disable)
-Show or hide items on customer site
This is the core feature where all actual products (food items) are managed.
1
Add new food items
2
Set item price
3
Assign category and menu
4
Control availability (enable/disable)
5
Show or hide items on customer site
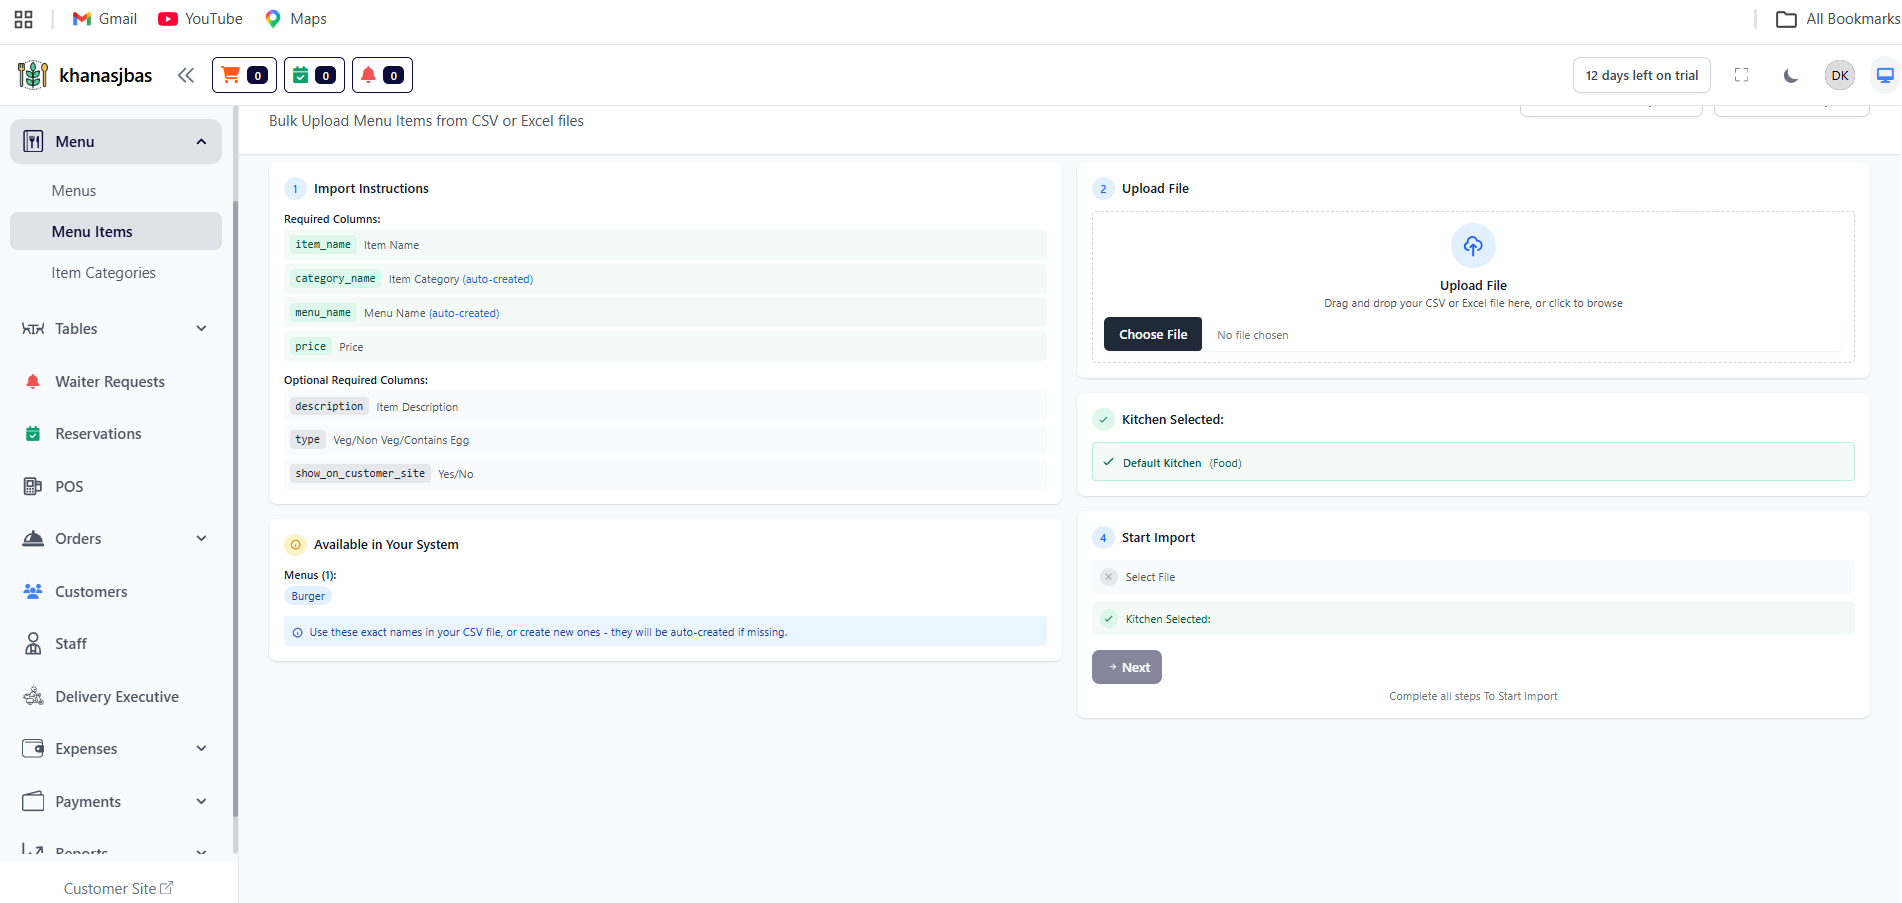
Bulk Upload
The Bulk Upload Menu Items feature in DatabridgeCRM allows the admin to add multiple menu items at once using a CSV or Excel file. This feature is highly useful when setting up a new restaurant menu or importing a large number of items quickly.
Instead of adding items manually one by one, the admin can prepare a structured file and upload it to the system, saving time and effort.
Key Functions
-Upload multiple menu items in one go
-Automatically create categories and menus if not already available
-Reduce manual data entry
-Speed up initial setup process
1
Click Bulk Upload
2
Upload CSV/Excel File
3
Select Kitchen
4
Start Import
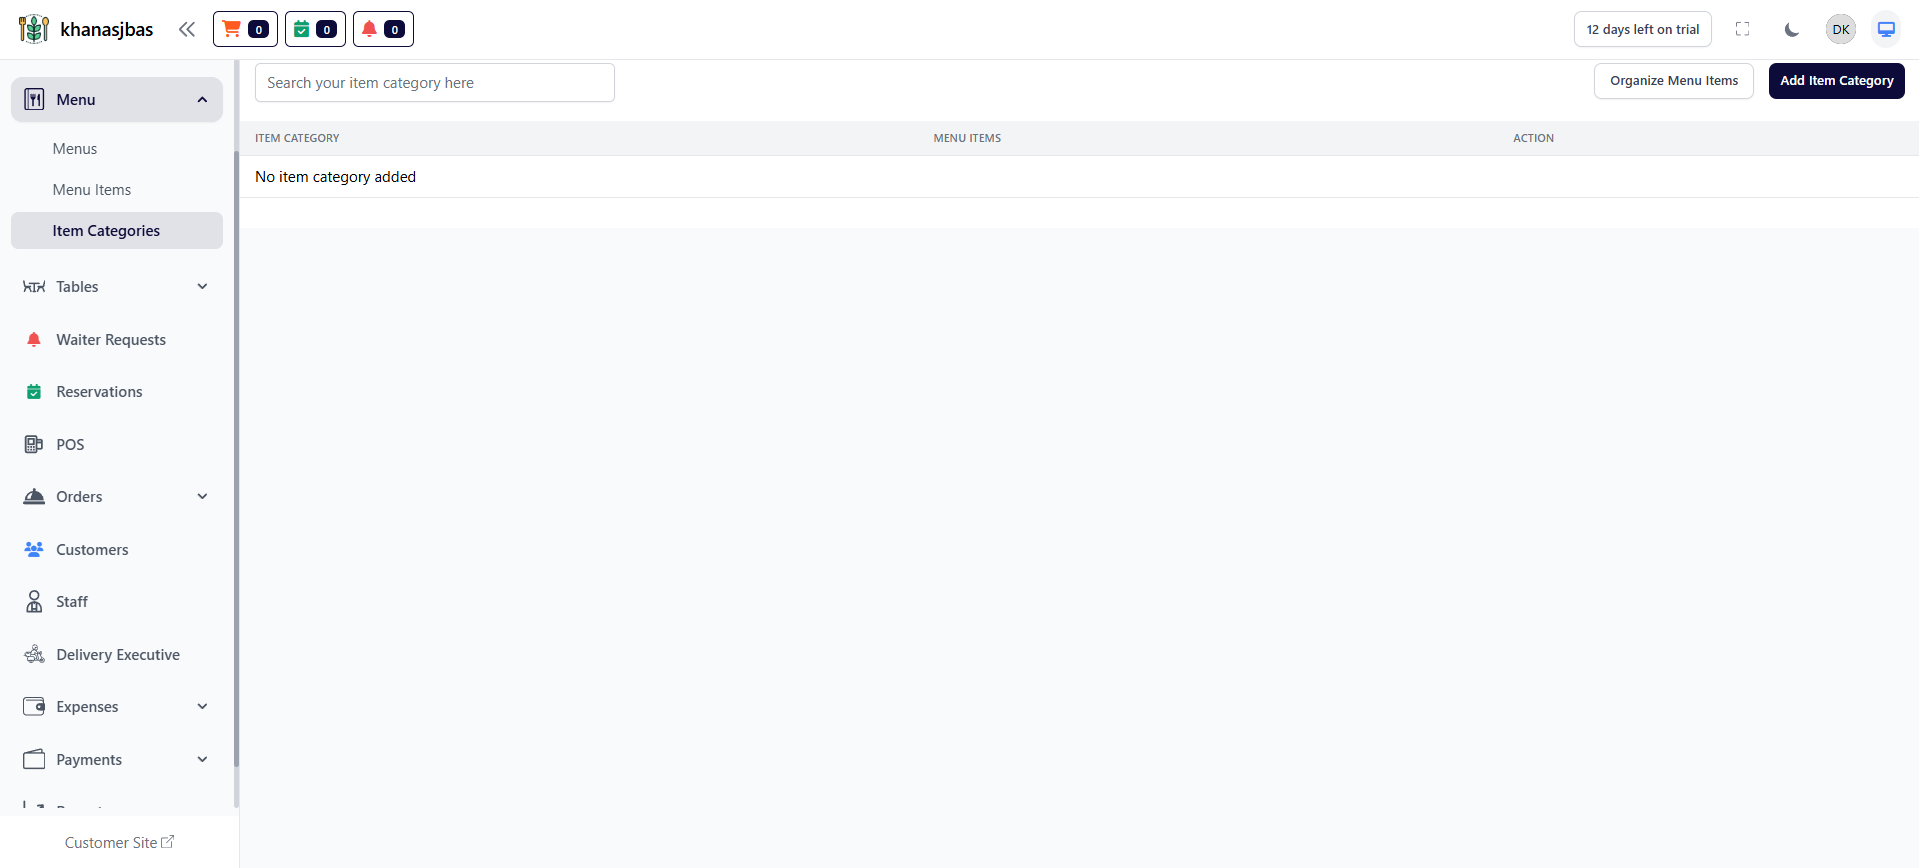
Item Categories
The Item Categories feature is used to group menu items into categories like Veg, Non-Veg, Drinks, Desserts, etc.
This improves menu organization and helps customers easily navigate items.
The Item Categories feature is used to group menu items into categories like Veg, Non-Veg, Drinks, Desserts, etc.
This improves menu organization and helps customers easily navigate items.
1
Item Categories
2
Add Category
3
Save
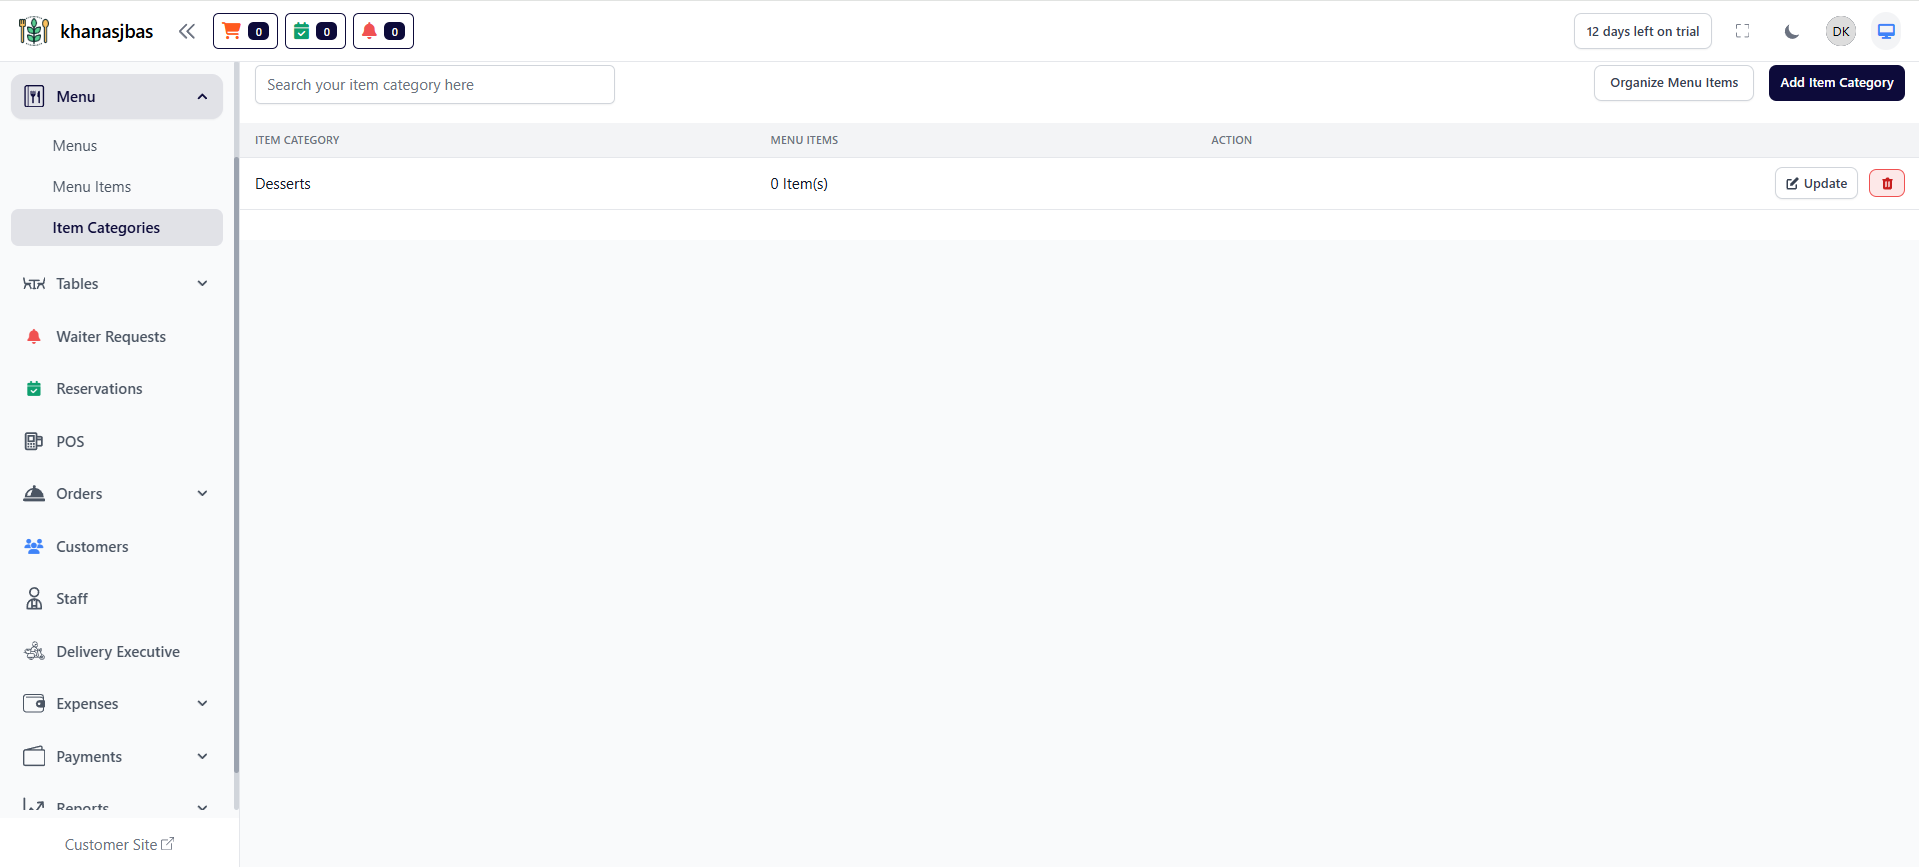
Item Categories Management
The Item Categories Management feature in DatabridgeCRM allows the admin to create and manage categories for menu items such as Veg, Non-Veg, Desserts, Beverages, etc.
These categories help in organizing menu items in a structured way, making it easier for both admin and customers to filter and navigate food items.
1
Item categories
2
Add Item Categories
3
Enter Categories
4
Save
Tables Management
The Tables Management Module in DatabridgeCRM is used to manage the restaurant’s seating system. It allows the admin to create areas, add tables, assign seating capacity, and generate QR codes for each table.This module helps in organizing the dining space efficiently and enables smooth order management through table-based operations.
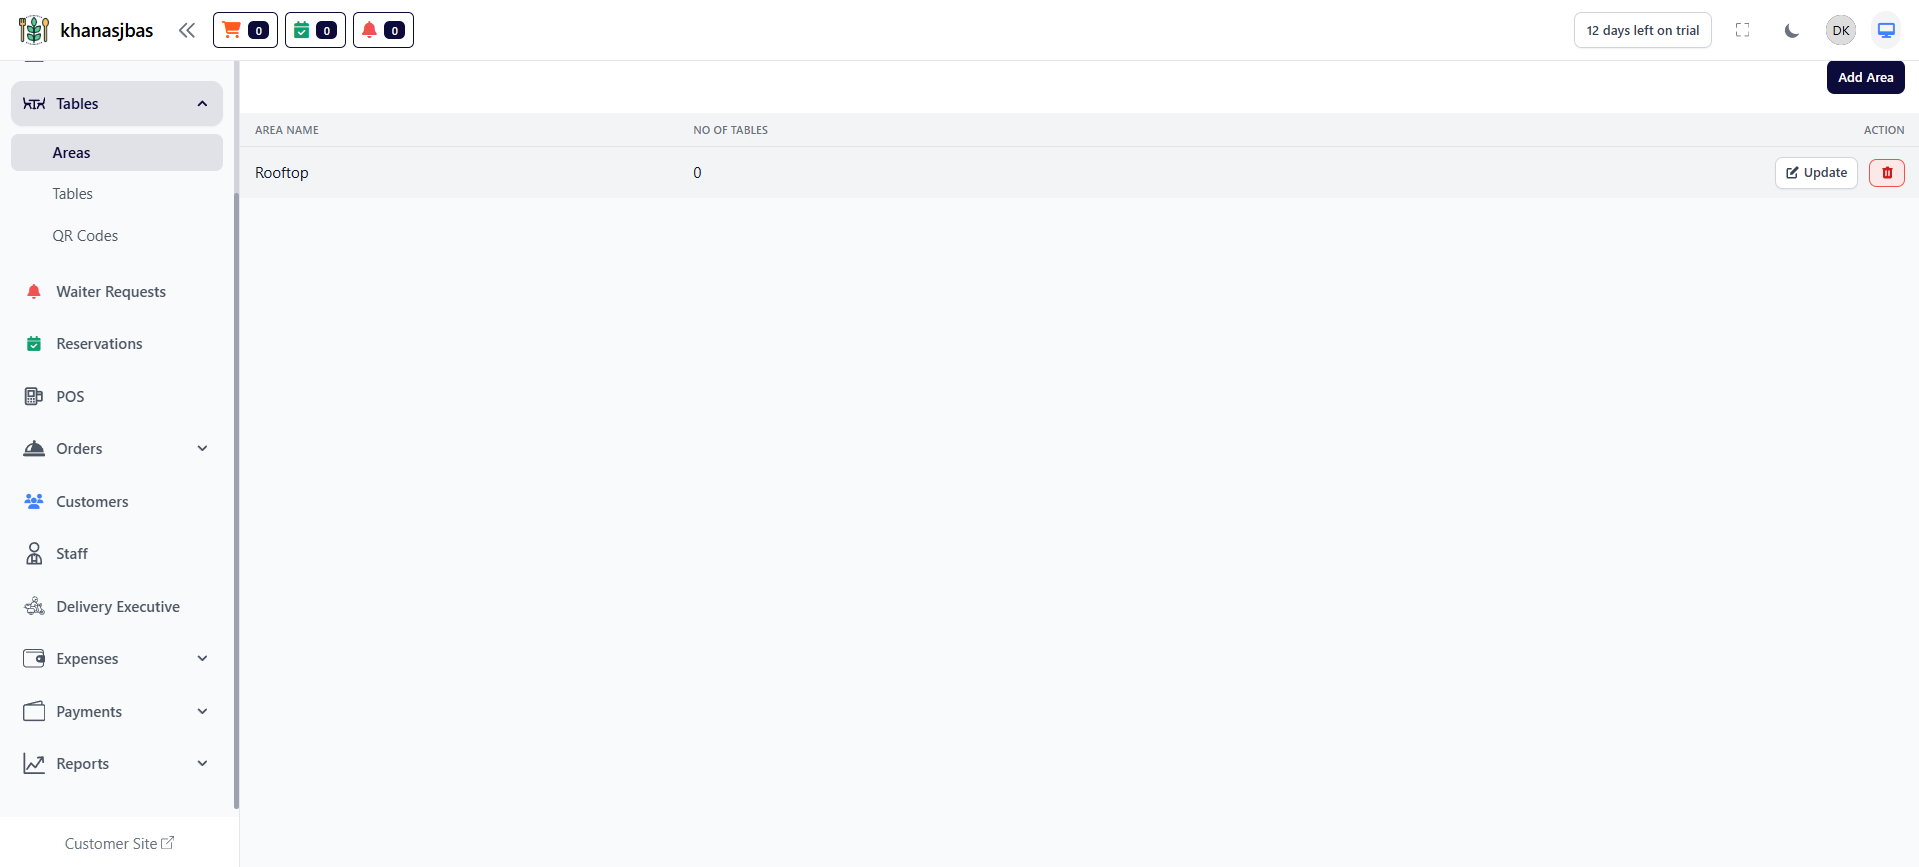
Areas
The Areas feature allows the admin to divide the restaurant into different sections such as Rooftop, Indoor, Outdoor, AC Hall, etc.
Each area contains multiple tables, helping in better organization of seating.
The Areas feature allows the admin to divide the restaurant into different sections such as Rooftop, Indoor, Outdoor, AC Hall, etc.
Each area contains multiple tables, helping in better organization of seating.
1
Tables
2
Add Area
3
Enter Area Name
4
Save
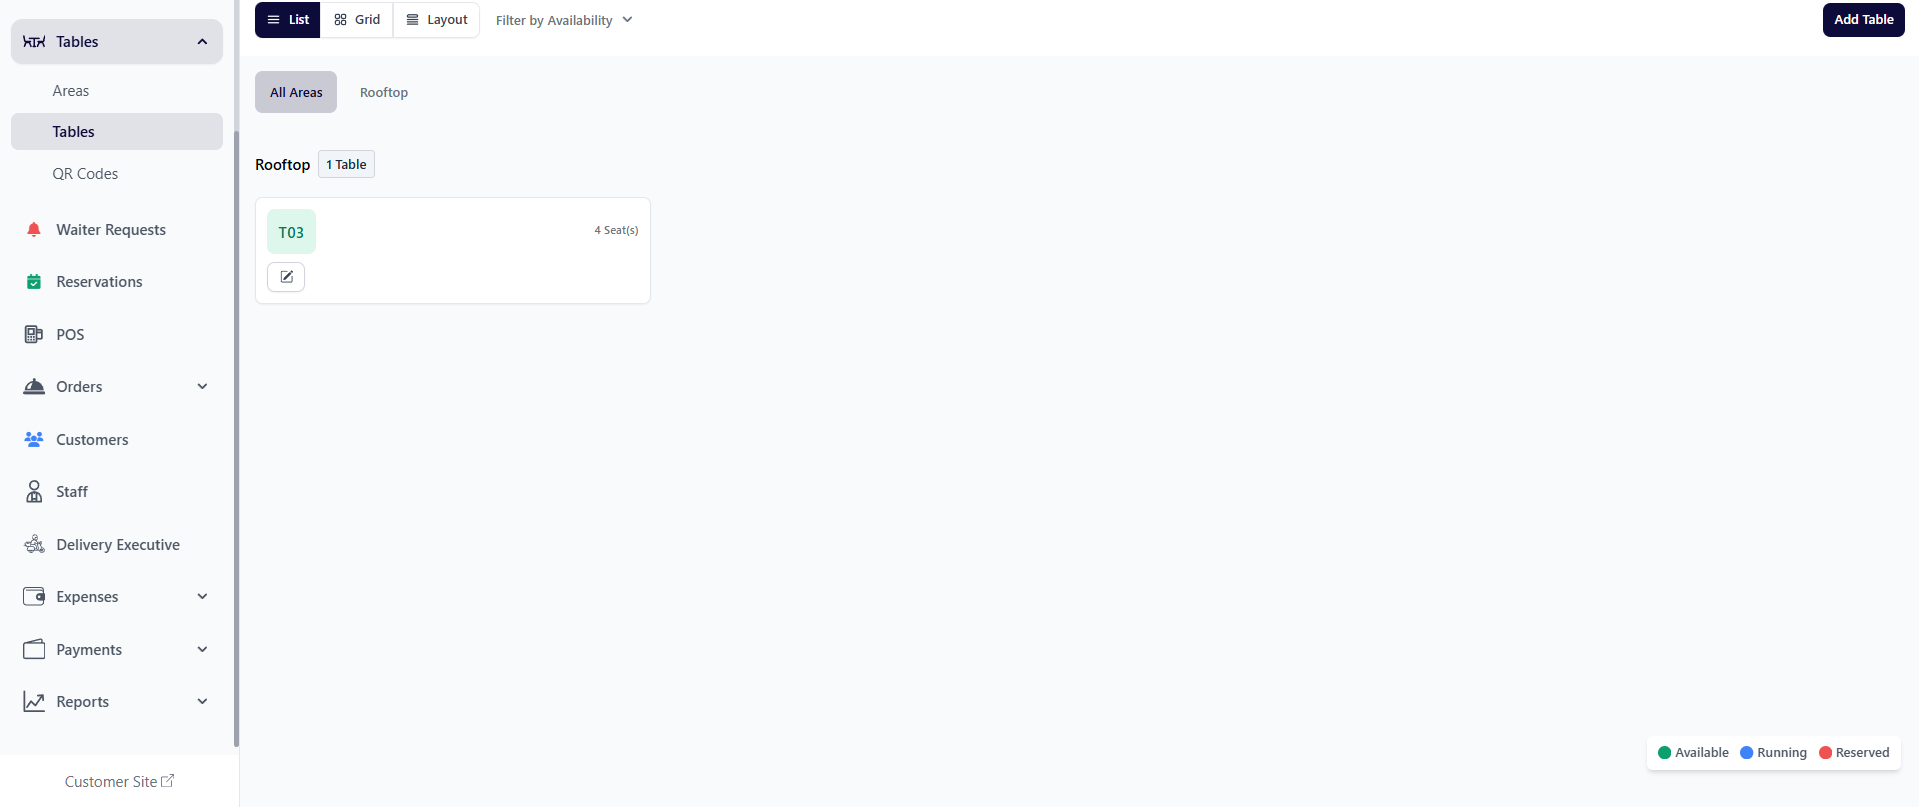
Tables:
The Tables feature allows the admin to create and manage all tables available in the restaurant.
Each table is assigned to a specific area and has a unique table code and seating capacity.
Fields Explanation
-Choose Area: Select the area where the table belongs
-Table Code: Unique identifier (e.g., T01, T02)
-Seating Capacity: Number of people the table can accommodate
-Status: Active / Inactive
1
Tables
2
Click Add Table
3
Select Area
4
Enter Table Code
5
Enter Capacity
6
Save
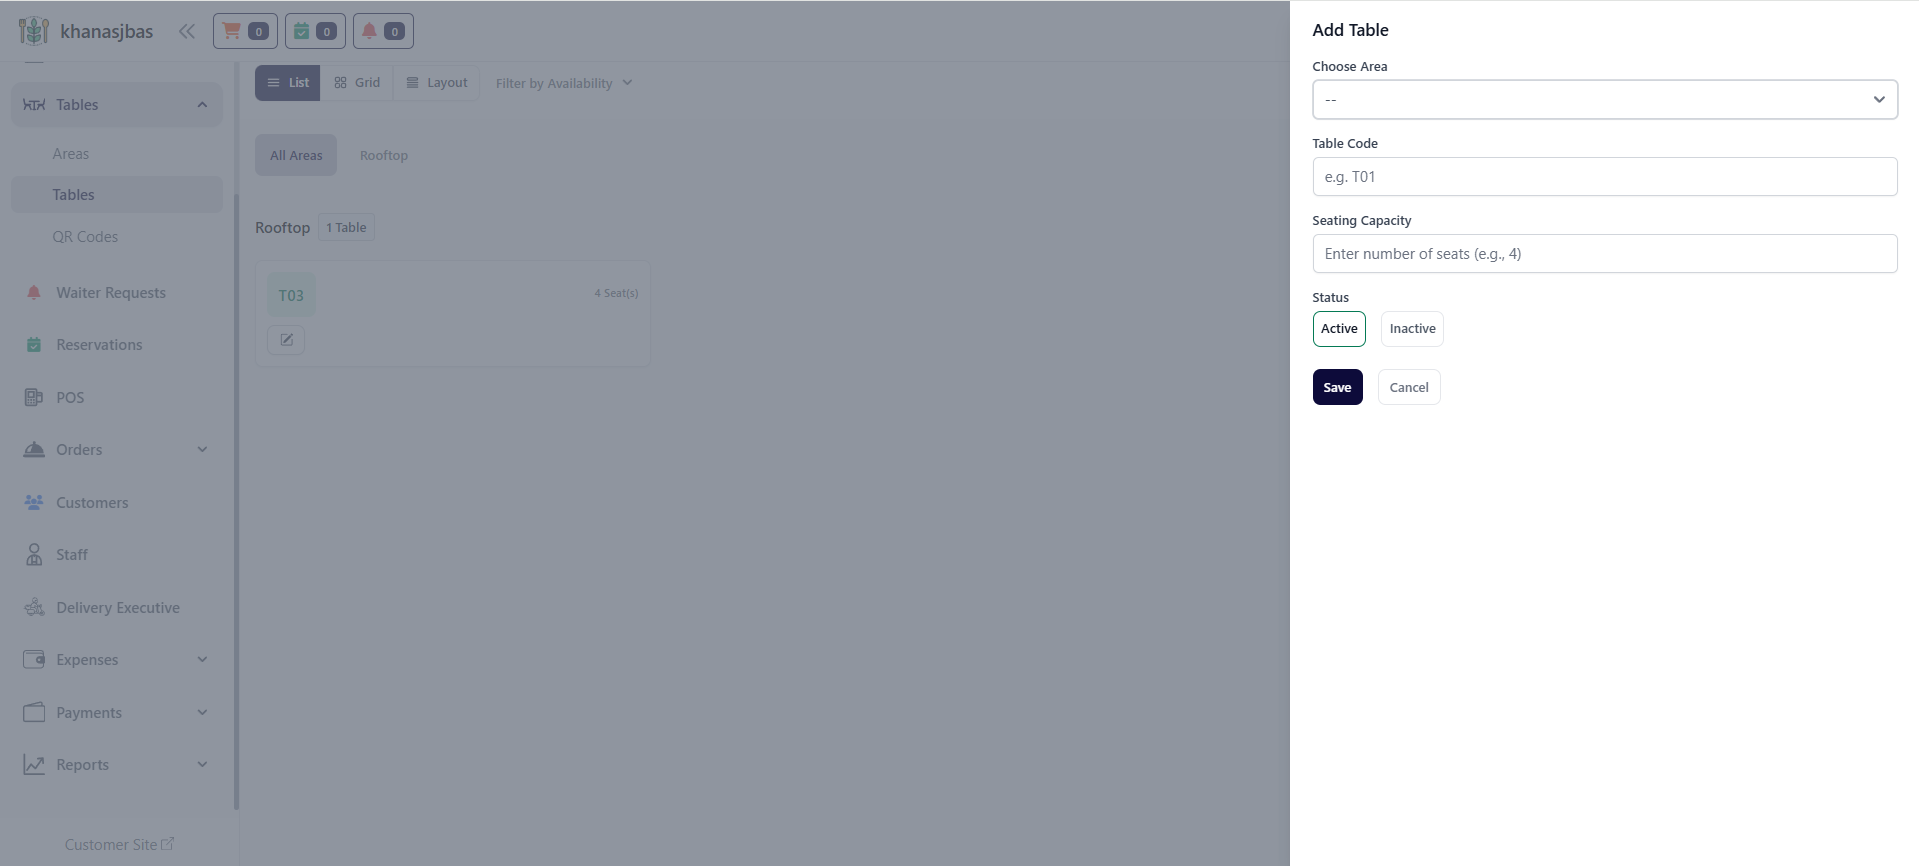
Add Tables:
The Add Table feature in DatabridgeCRM allows the admin to create a new table in the restaurant system.
This feature is essential for setting up the restaurant’s seating structure. Each table is assigned to a specific area and is given a unique table code along with its seating capacity.
Fields Explanation
-Choose Area
-Select the area where the table will be placed (e.g., Rooftop, Indoor, Outdoor).
-Table Code
->A unique identifier for the table (e.g., T01, T02, T03).
->This helps staff easily recognize and manage tables.
-Seating Capacity
->Defines how many customers can sit at the table.
Example: 2, 4, 6 seats.
-Status (Active / Inactive)
->Active → Table is available for use
->Inactive → Table is temporarily disabled
1
Click Add Table
2
Select Area
3
Enter Table Code
4
Enter Seating Capacity
5
Select Status
6
Save
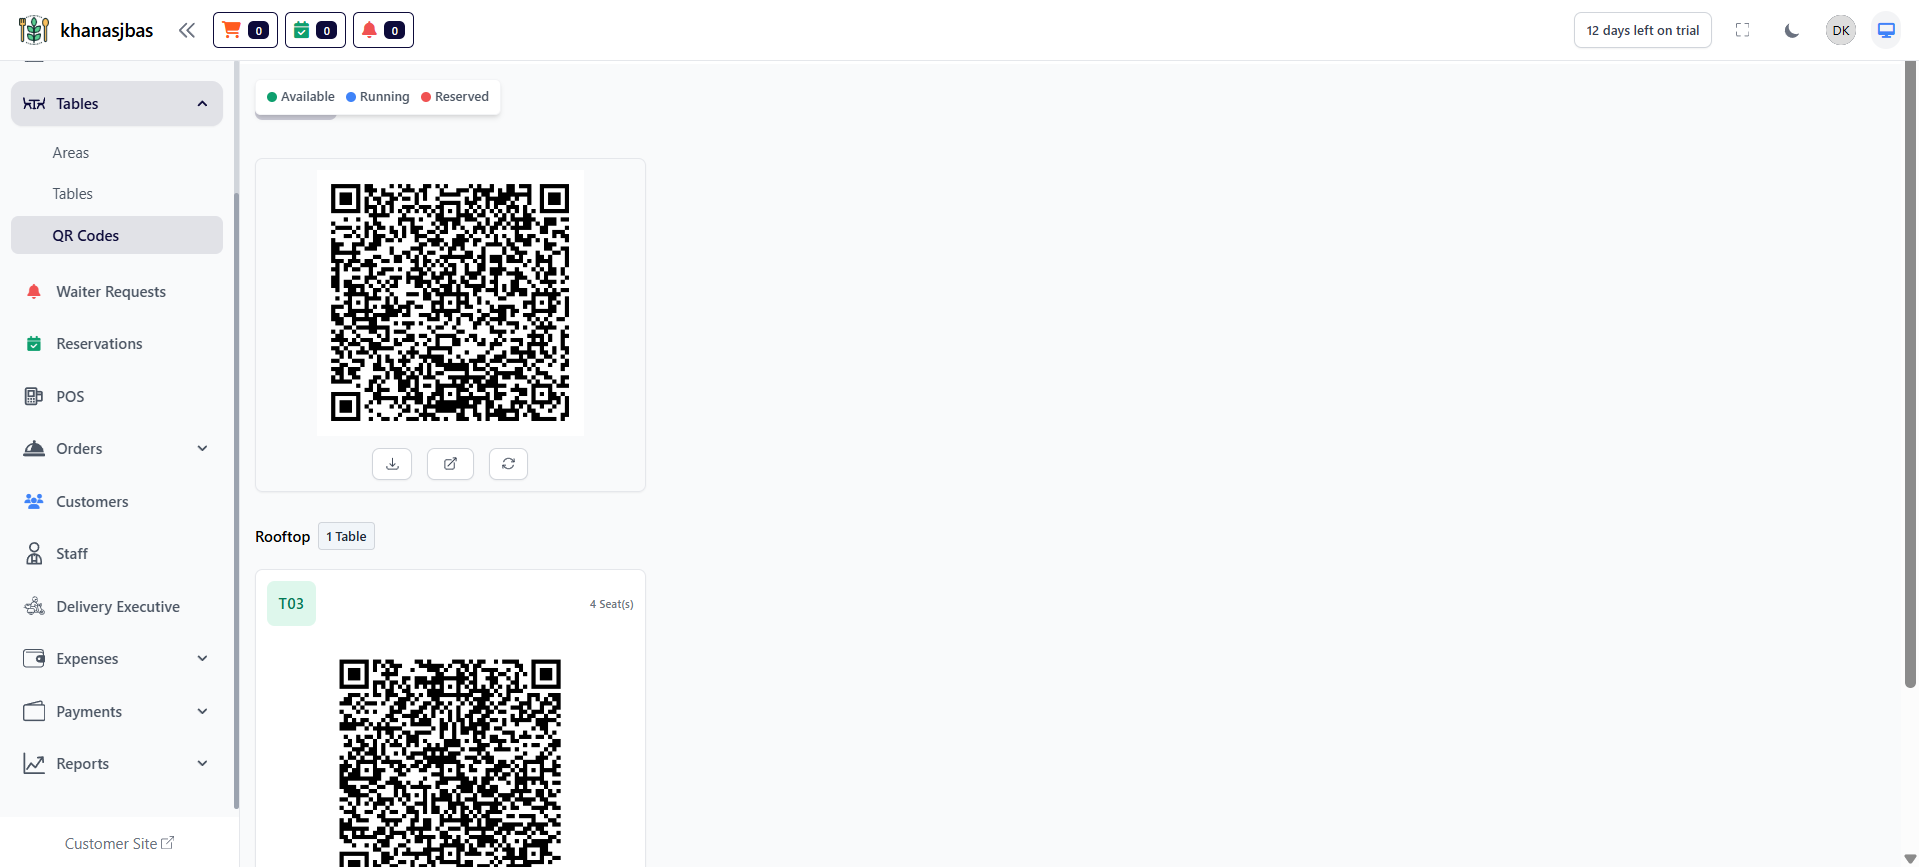
QR Codes for Tables:
Each table has a unique QR Code that customers can scan to access the digital menu or place orders.
Key Functions
-Generate QR code automatically
-Download QR code
-Share QR code
-Refresh QR code
Each table has a unique QR Code that customers can scan to access the digital menu or place orders.
Key Functions
-Generate QR code automatically
-Download QR code
-Share QR code
-Refresh QR code
1
Tables
2
QR Codes
3
View QR Code
4
Download
5
Share
6
Refresh
Waiter Requests Management
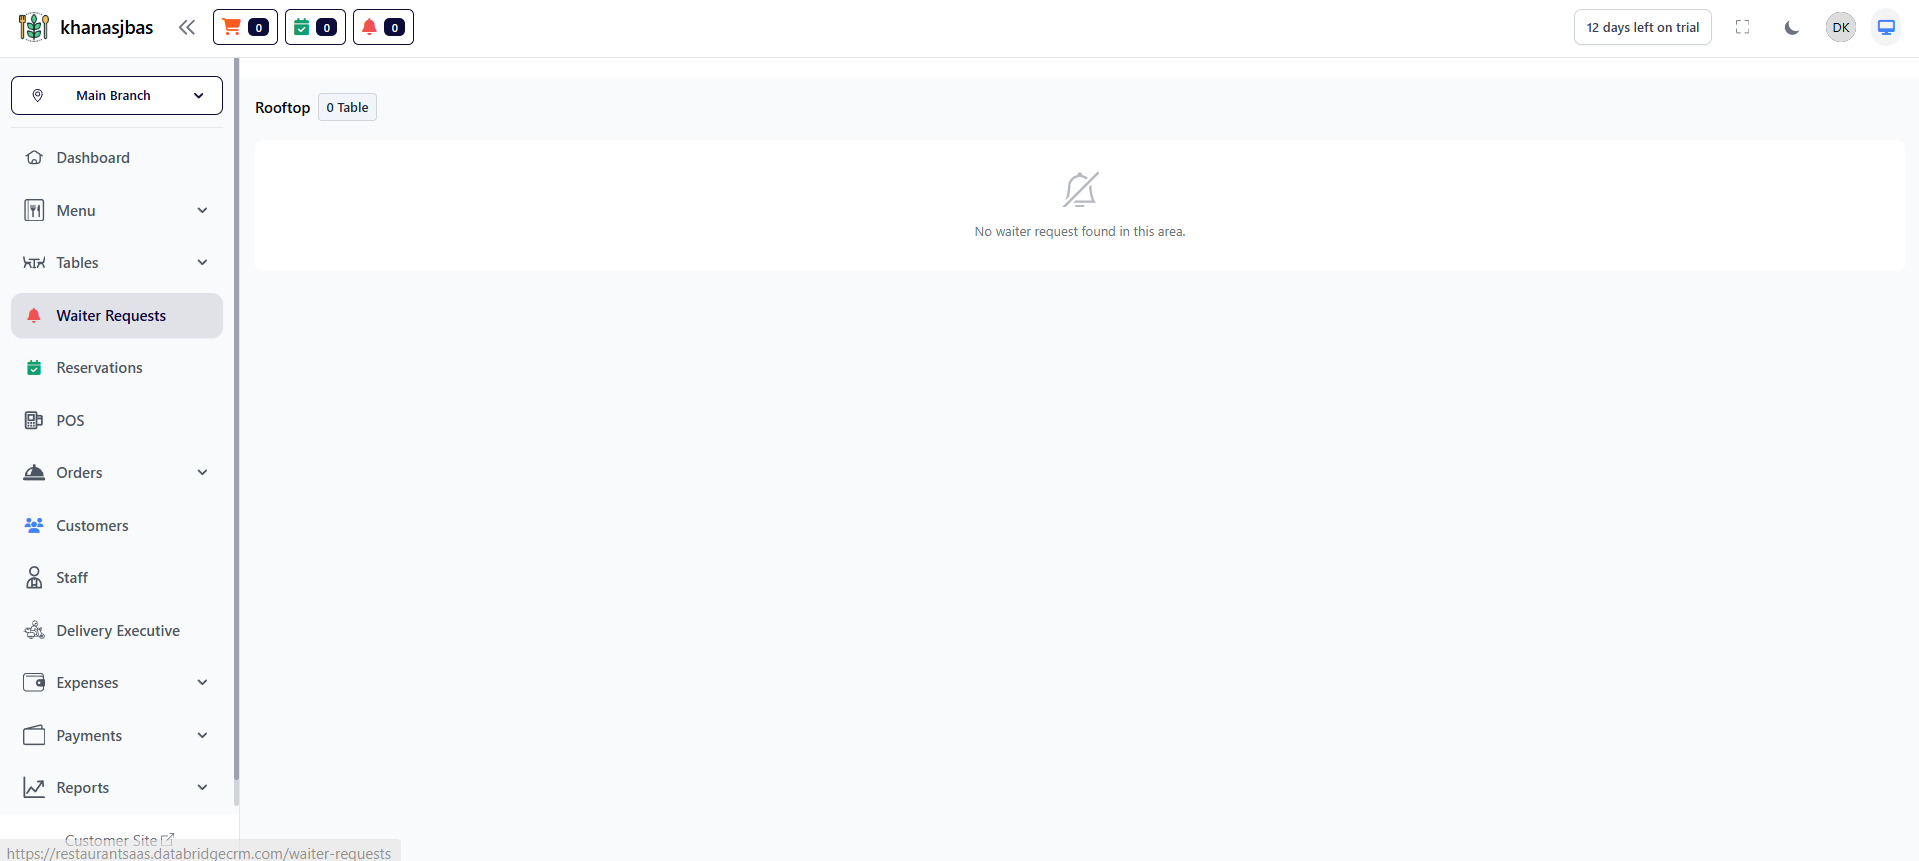
The Waiter Requests Management feature in DatabridgeCRM allows the admin and staff to monitor and manage service requests raised by customers from their tables.
This feature is mainly used in QR-based ordering systems where customers can request assistance (like water, bill, or service) directly from their table without calling a waiter.
It helps improve service efficiency and ensures that no customer request is missed.
->Feature: View Waiter Requests
This feature allows admin and staff to view and manage customer service requests raised from tables. It helps in providing faster and more efficient service.
It helps improve service efficiency and ensures that no customer request is missed.
->Feature: View Waiter Requests
This feature allows admin and staff to view and manage customer service requests raised from tables. It helps in providing faster and more efficient service.
Reservations Management
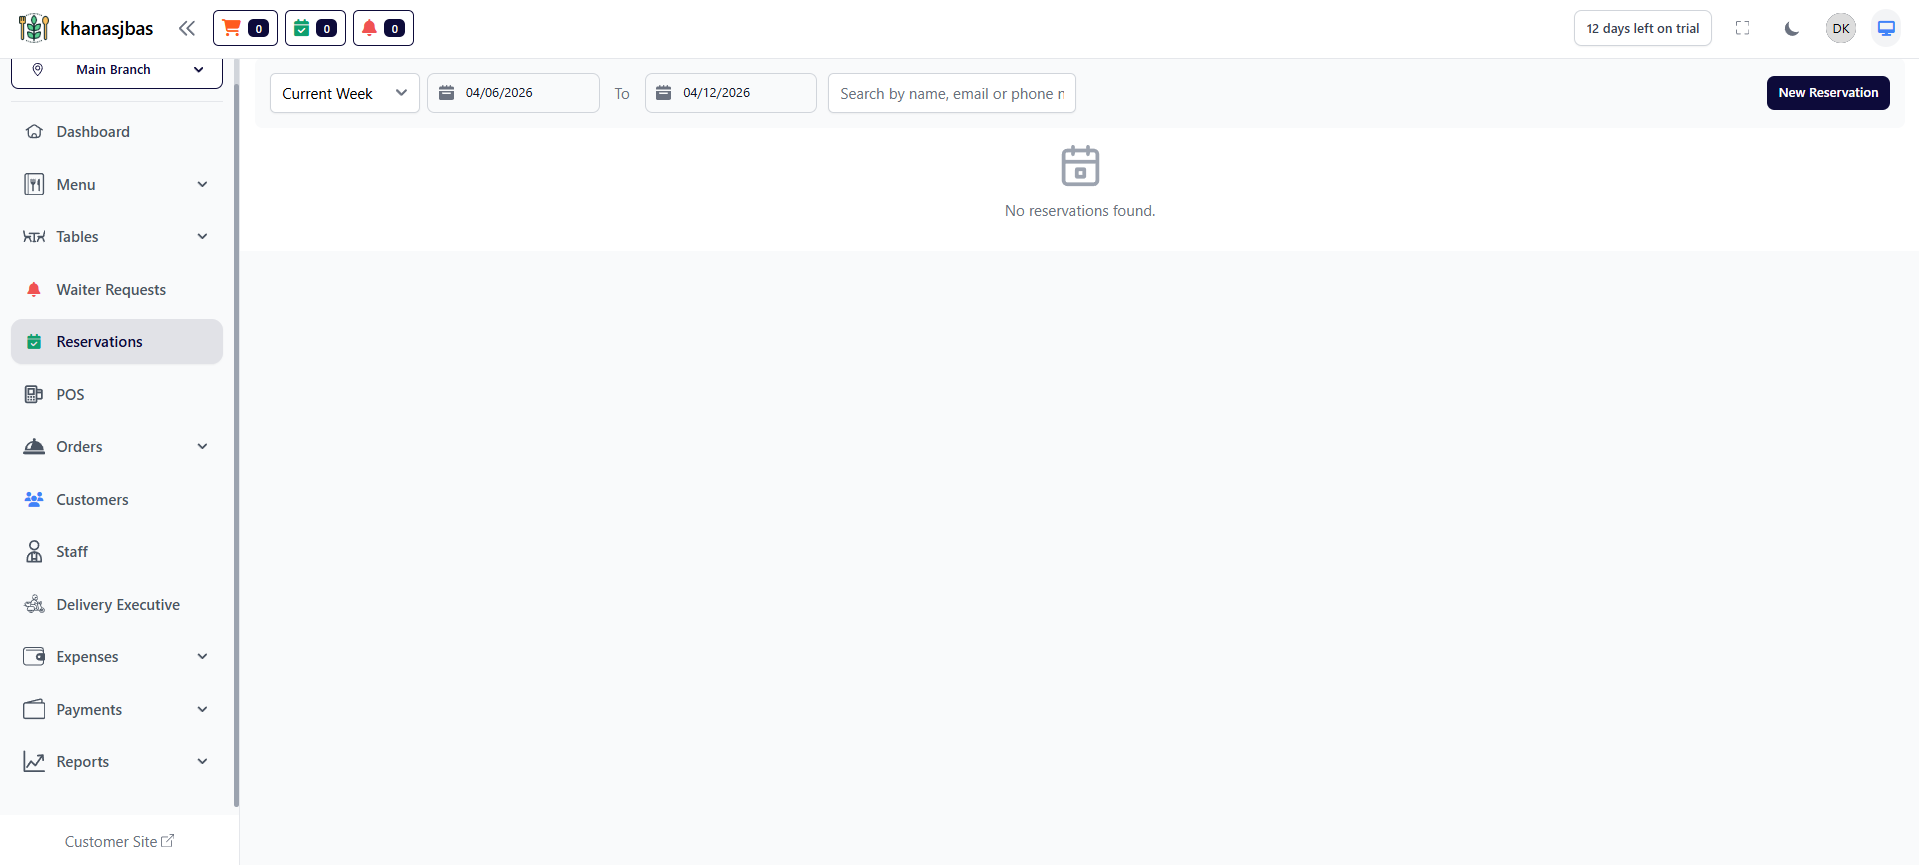
The Reservations Management feature in DatabridgeCRM allows the admin to manage table bookings and customer reservations efficiently.
New Reservation:
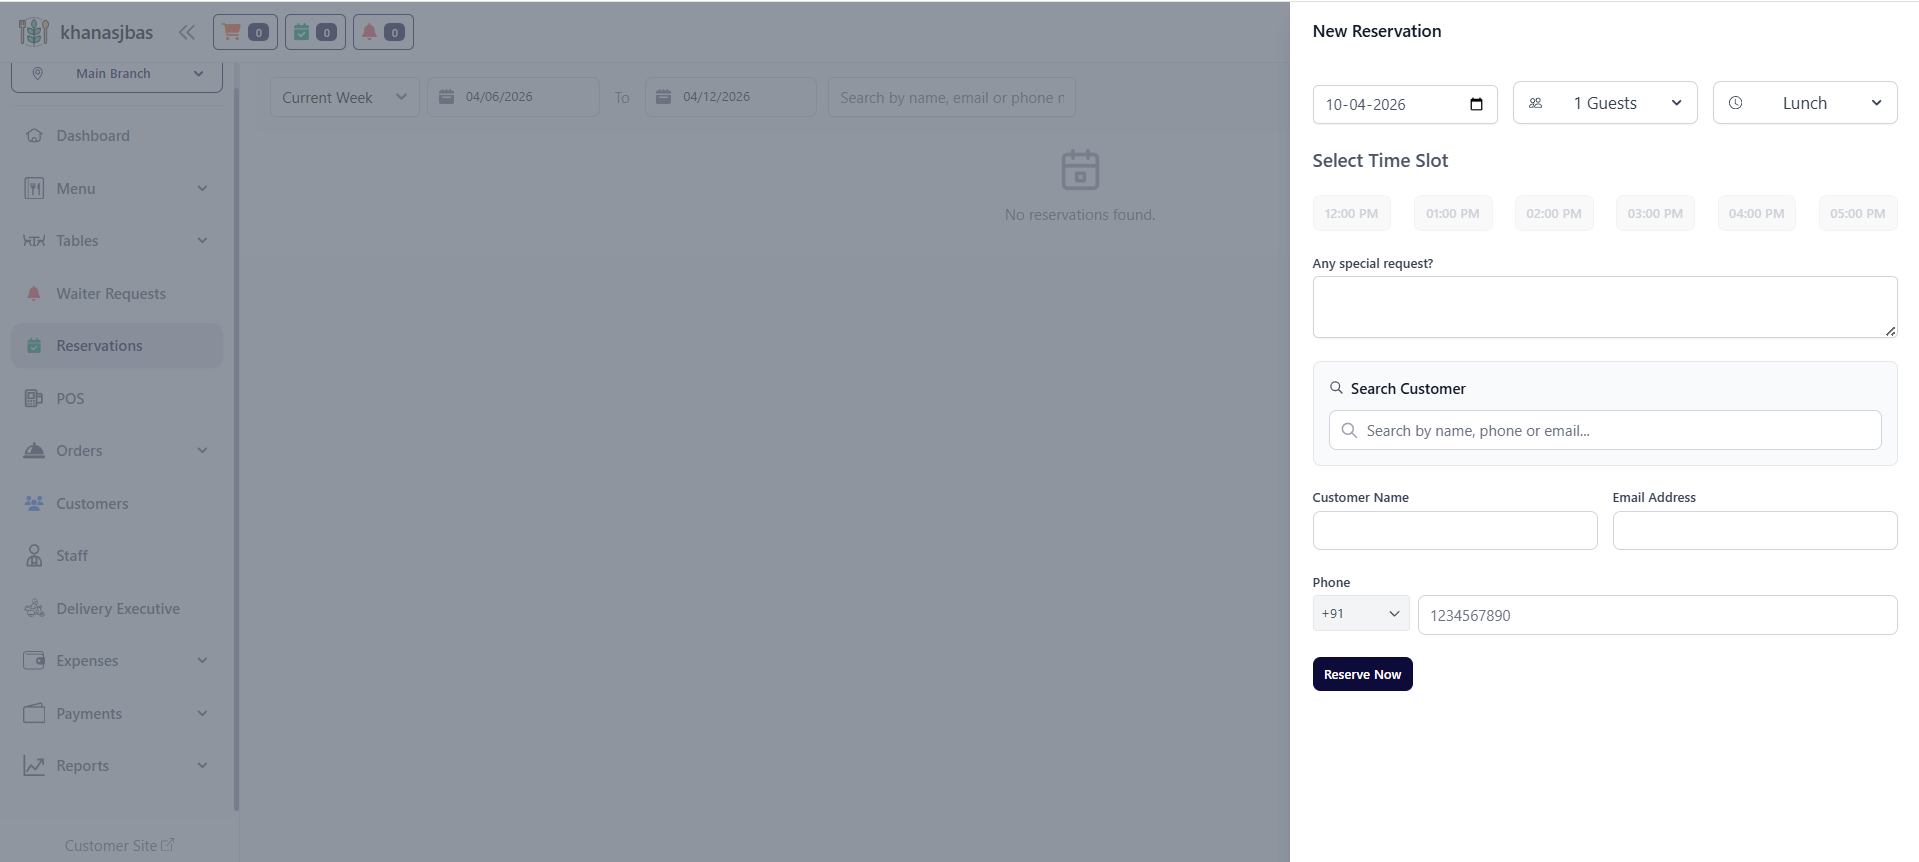
The New Reservation feature in DatabridgeCRM allows the admin to create a new table booking for customers in advance.
This feature helps in managing customer visits, scheduling dining time, and ensuring proper table allocation based on availability, guest count, and time slots.
It improves customer experience by reducing waiting time and organizing restaurant seating efficiently.
->Feature: Create New Reservation
The Create New Reservation feature allows the admin to add a new booking by filling out the reservation form.
This form includes all required details such as date, number of guests, meal type, time slot, and customer information.
1
Reservations
2
Click New Reservation
3
Select Date
4
Select Guests
5
Select Meal Type
6
Choose Time Slot
7
Enter Customer Details
8
Click Reserve Now
POS (Point of Sale) Management
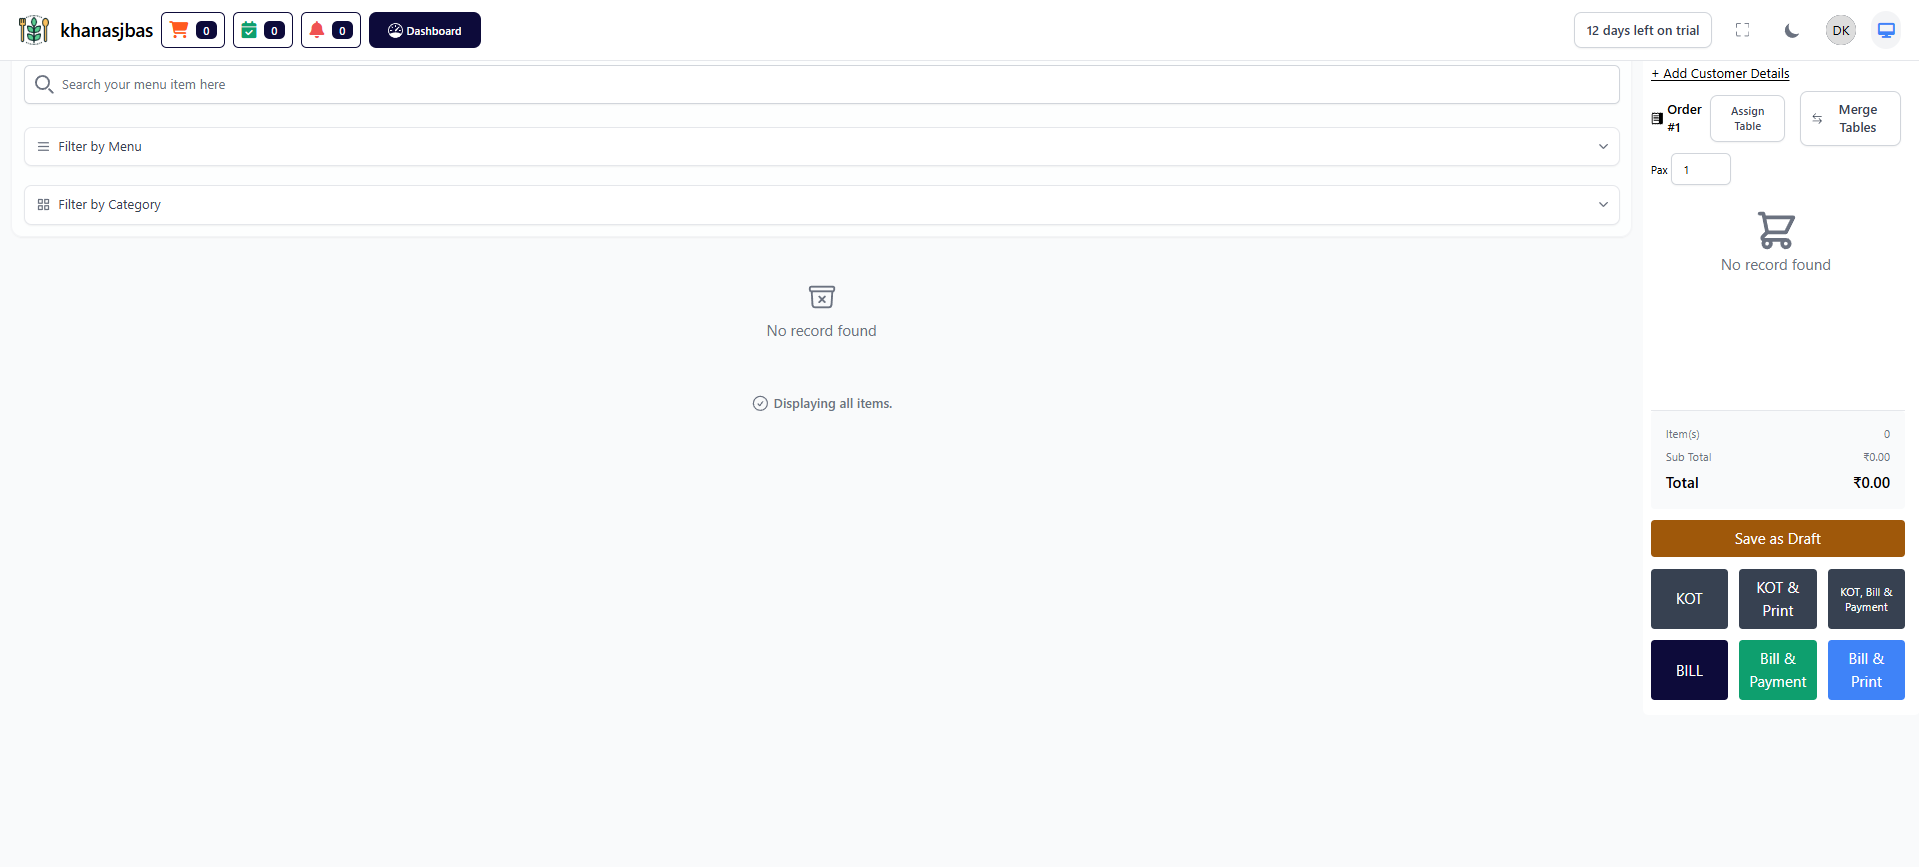
The POS (Point of Sale) module in DatabridgeCRM is used to create and manage customer orders, generate bills, and handle payments in real-time.This screen allows the admin or staff to select menu items, assign tables, manage orders, and complete billing operations efficiently.
->Search & Filter Menu Items:
This feature allows the user to quickly find menu items using the search bar or filter options.
->Order Panel:
The Order Panel (right side) displays all selected items for the current order.
->Add Customer Details:
This feature allows the admin to attach customer details to an order.
->Assign Table:
This feature allows assigning a table to the current order.
It is useful for dine-in operations where orders are linked to specific tables.
->Merge Tables:
This feature allows combining multiple tables into a single order.
->Save as Draft:
This feature allows saving the current order without completing billing.
->KOT (Kitchen Order Ticket):
The KOT (Kitchen Order Ticket) sends the order to the kitchen for preparation.
->KOT & Print:
This feature generates the kitchen order and prints it simultaneously.
->KOT, Bill & Payment:
This option completes the full flow:
-Send order to kitchen
-Generate bill
-Process payment
->Bill:
This feature generates the final bill for the order without processing payment.
->Bill & Payment:
This feature allows generating the bill and completing payment in one step.
->Bill & Print:
This feature generates the bill and prints it for the customer.
Orders Management
The Orders Management Module in DatabridgeCRM is used to track, manage, and monitor all restaurant orders from creation to completion.This module includes KOT (Kitchen Order Tracking) and Orders List, allowing the admin to view order status, filter orders, and manage the complete order lifecycle.It ensures smooth coordination between the front desk and kitchen operations.
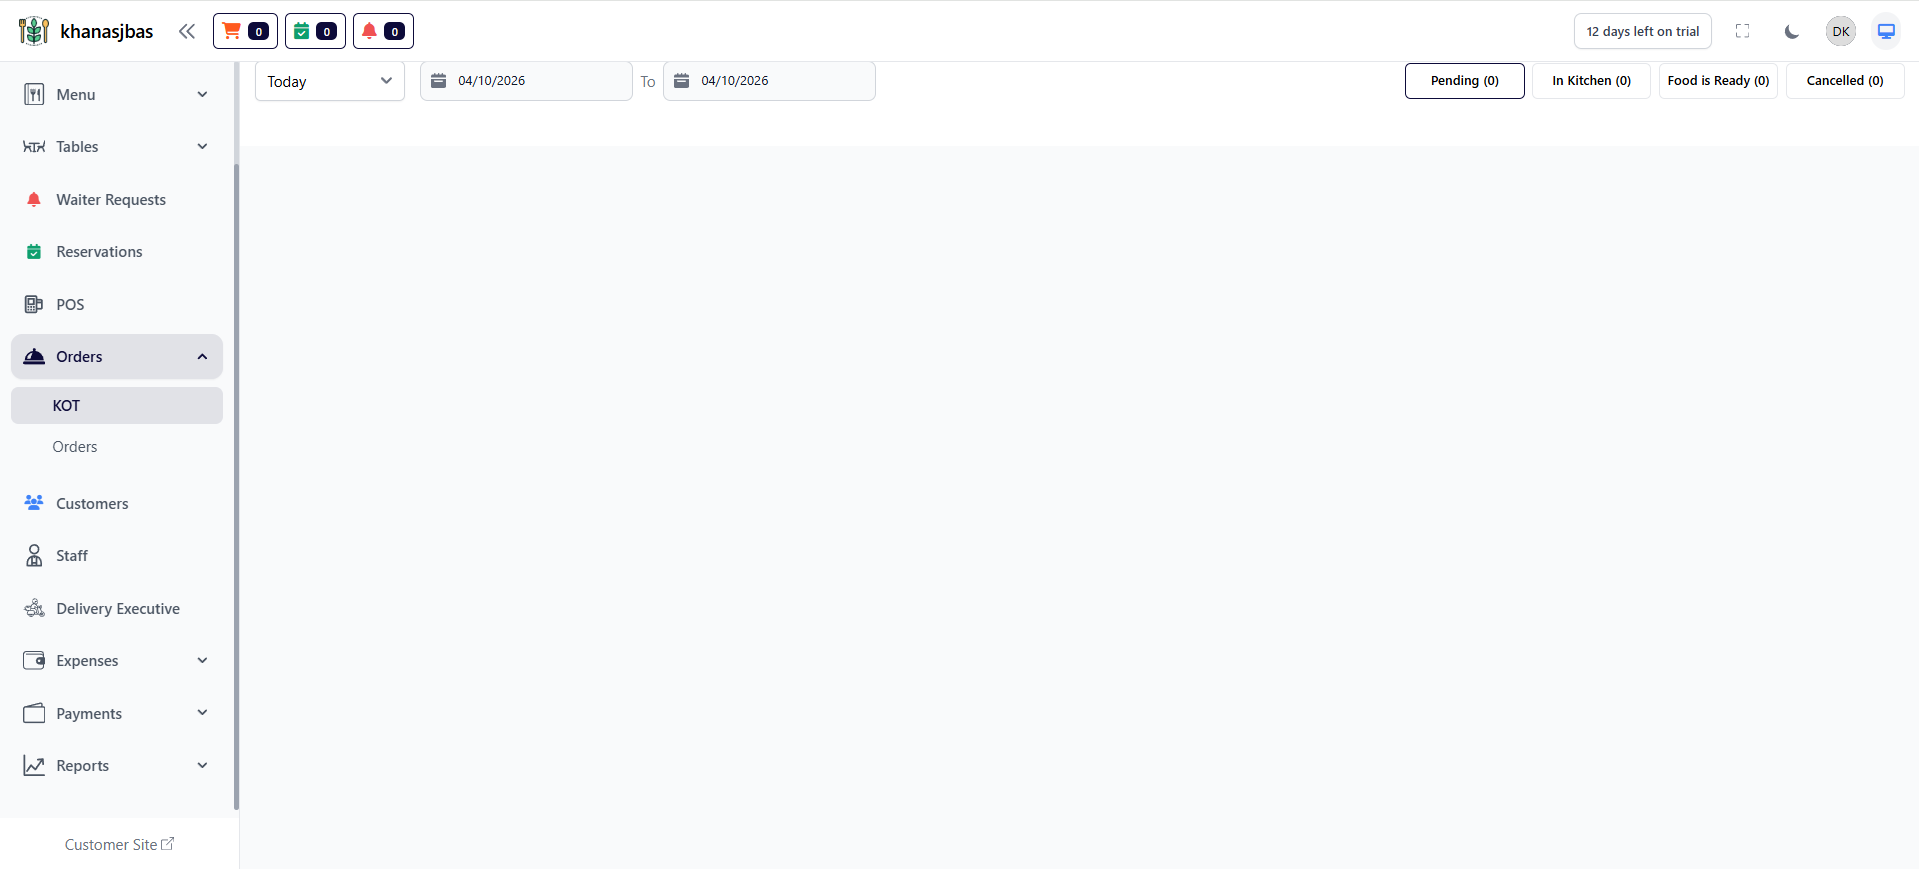
KOT (Kitchen Order Tracking):
The KOT screen is used to track orders based on their preparation status in the kitchen.
Order Status Tabs
-Pending → Order received but not started
-In Kitchen → Food is being prepared
-Food is Ready → Order is ready to serve
-Cancelled → Order has been cancelled
The KOT screen is used to track orders based on their preparation status in the kitchen.
Order Status Tabs
-Pending → Order received but not started
-In Kitchen → Food is being prepared
-Food is Ready → Order is ready to serve
-Cancelled → Order has been cancelled
1
Orders
2
KOT
3
Select Date Range
4
View Order Status
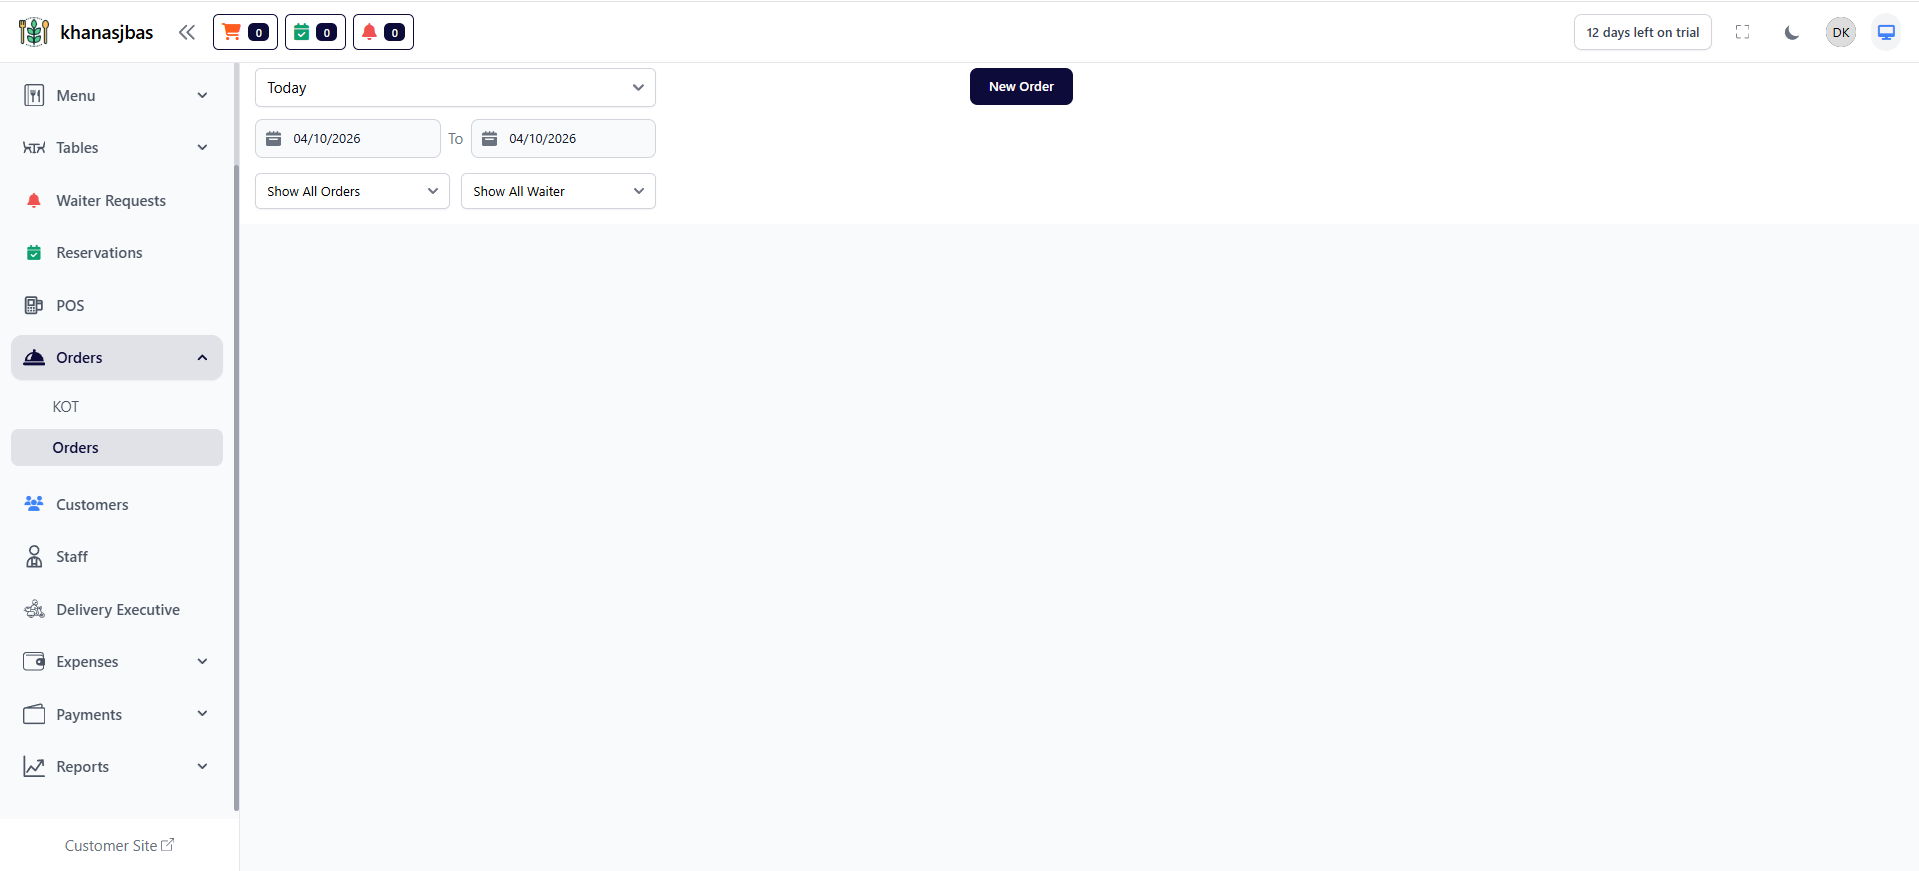
Orders List:
The Orders List screen shows all orders created in the system.
Filters Available:
-Date range
-Order type
-Waiter filter
The Orders List screen shows all orders created in the system.
Filters Available:
-Date range
-Order type
-Waiter filter
1
Orders
2
Select Date
3
Apply Filters
4
View Orders
New Order:
The New Order button allows the admin or staff to quickly create a new order.
When clicked, this button redirects the user to the POS (Point of Sale) screen, where the actual order is created.
How It Works
->User clicks on New Order button
->System redirects to POS screen
->User selects items, assigns table, and creates order
->Order is saved and tracked in Orders module
1
Orders
2
Click New Order
3
Redirect to POS Screen
4
Create Order
Customers Management
The Customers Management Module in DatabridgeCRM is used to manage all customer details in one place.It allows the admin to store customer information such as name, email, phone number, and address. This helps in tracking customer history, improving service, and maintaining proper records for future reference.
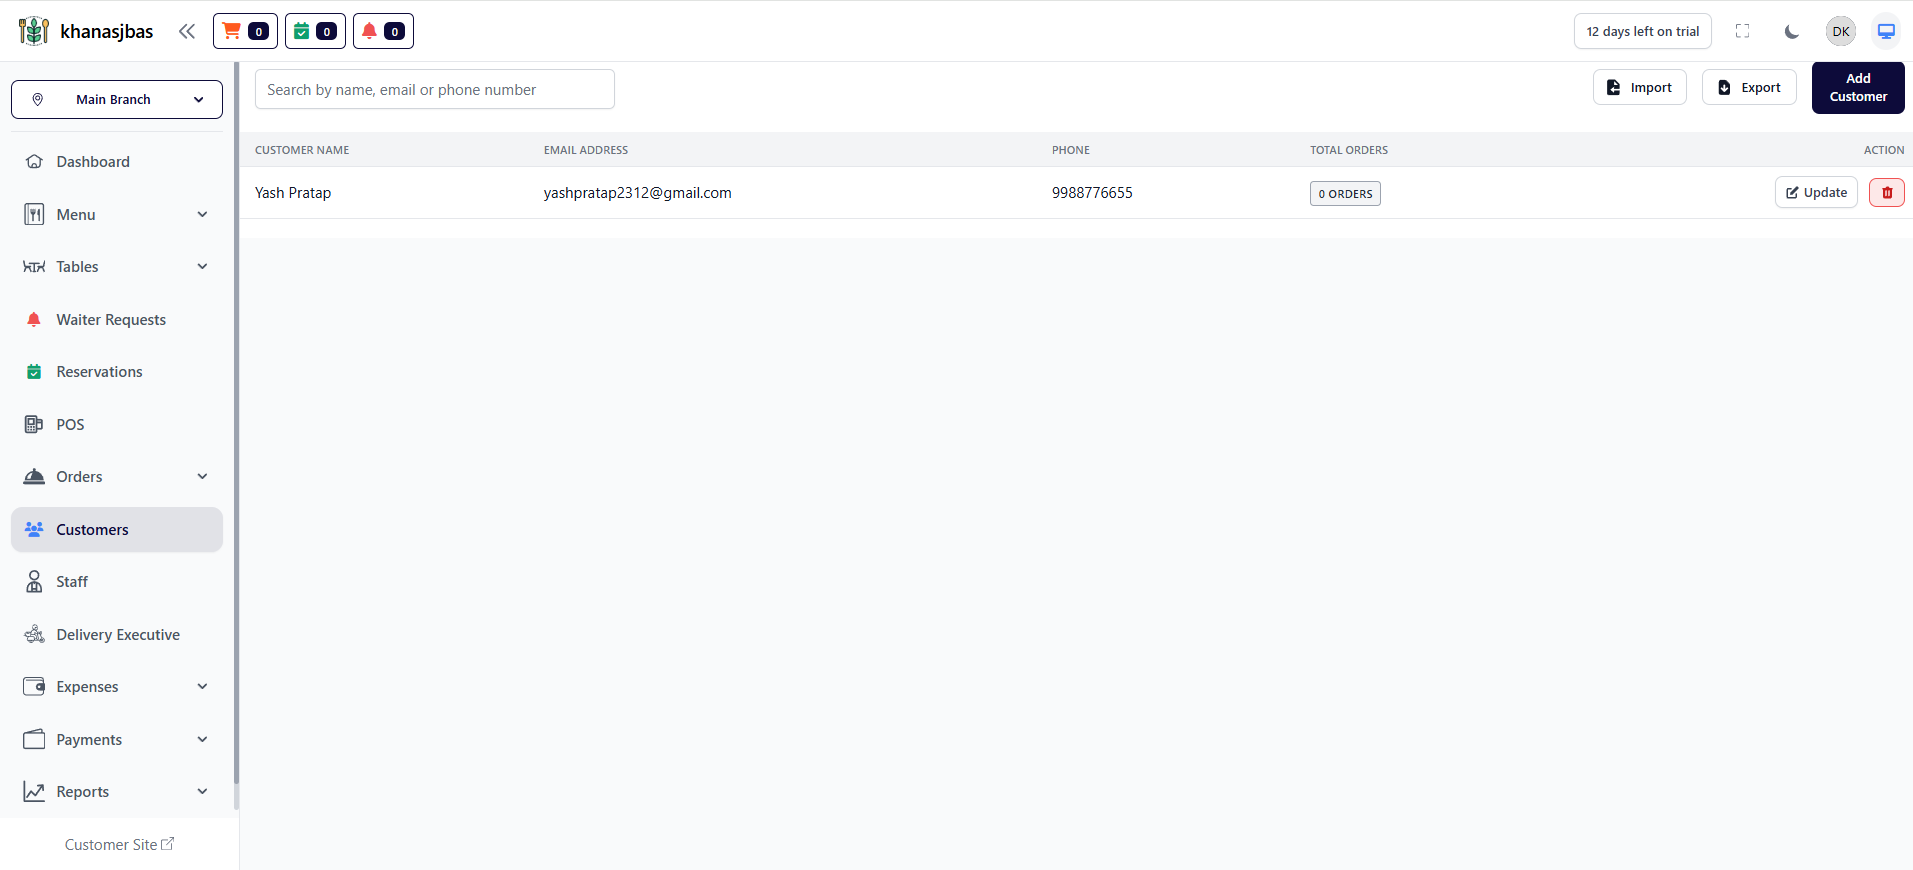
View Customers List:
The Customers List screen displays all registered customers along with their details.
Screen Elements:
-Search Bar
Search customers by name, email, or phone number
-Customer Table Columns
->Customer Name
->Email Address
->Phone Number
->Total Orders
->Action (Update/Delete)
-Import Button
->Upload customer data in bulk
-Export Button
->Download customer data
-Add Customer Button
->Create a new customer
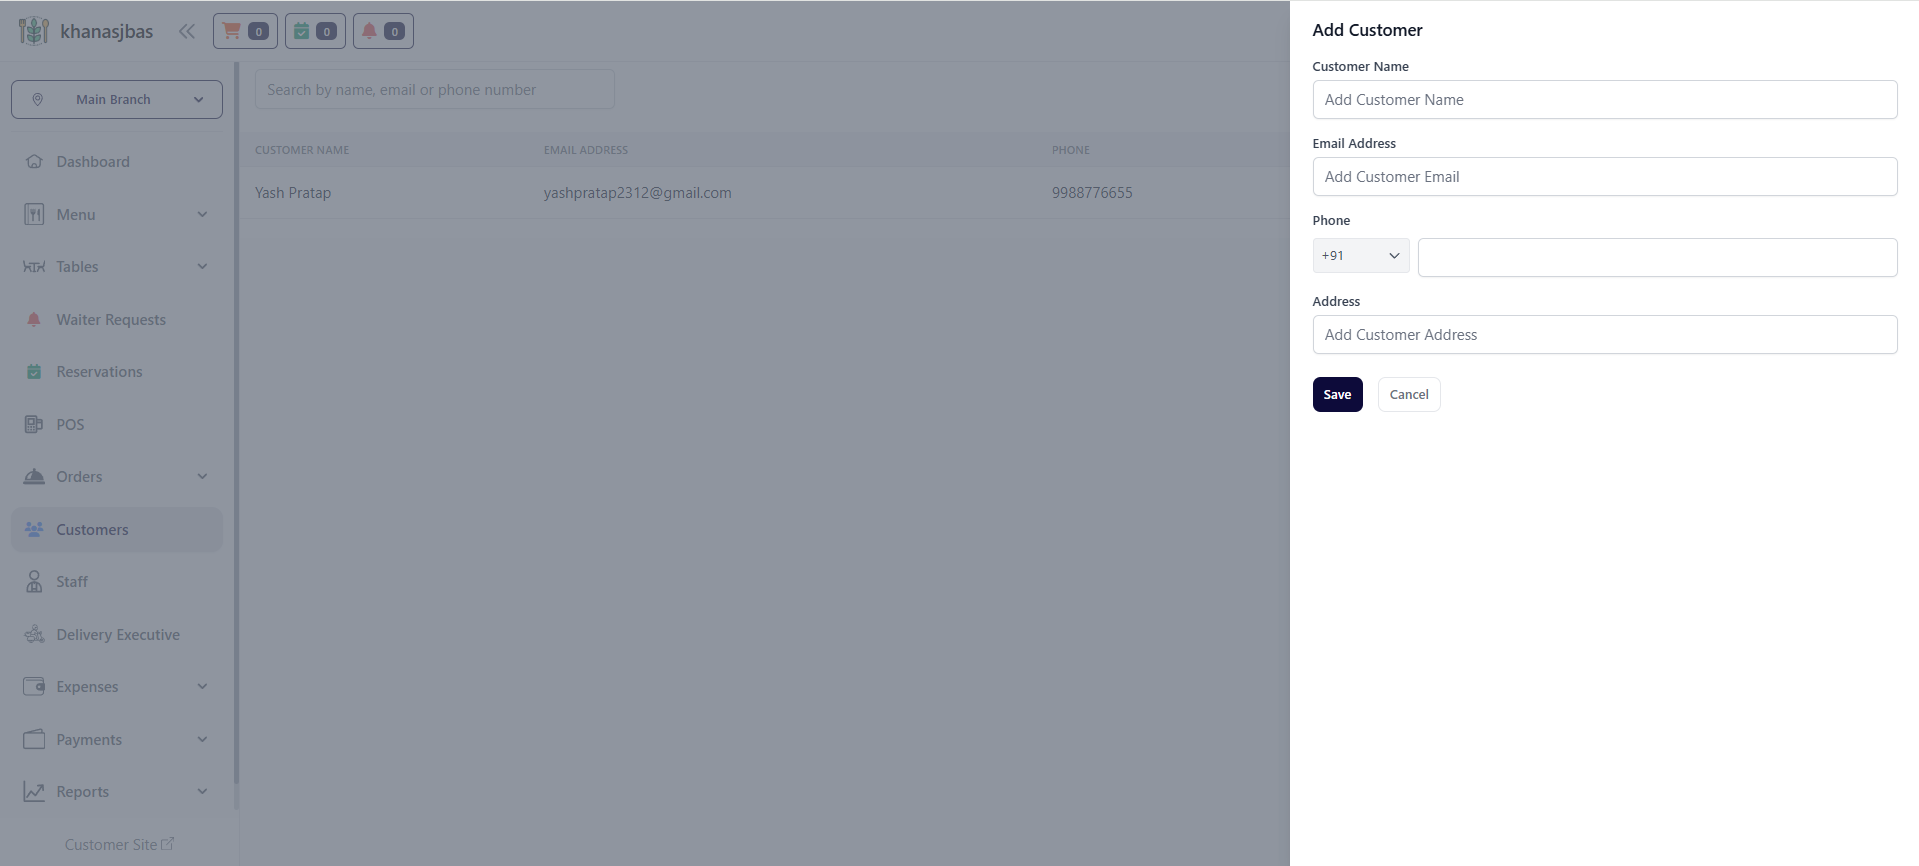
Add Customer:
The Add Customer feature allows the admin to create a new customer profile.
This is useful when:
->Adding walk-in customers
->Storing customer data for future orders
->Linking customer details with orders
The Add Customer feature allows the admin to create a new customer profile.
This is useful when:
->Adding walk-in customers
->Storing customer data for future orders
->Linking customer details with orders
1
Customers
2
Click Add Customer
3
Enter Details
4
Save
Update Customer:
This feature allows the admin to modify existing customer information.
Delete Customer:
This feature allows the admin to remove a customer from the system.
This feature allows the admin to modify existing customer information.
Delete Customer:
This feature allows the admin to remove a customer from the system.
Staff Management (Add Member)
The Add Staff Member feature allows the admin to create and manage staff accounts within the system.Using this feature, the admin can add new team members such as Admin, Waiter, Manager, or other roles, assign login credentials, and control their access to the system.This helps in organizing team operations, assigning responsibilities, and maintaining secure access control.
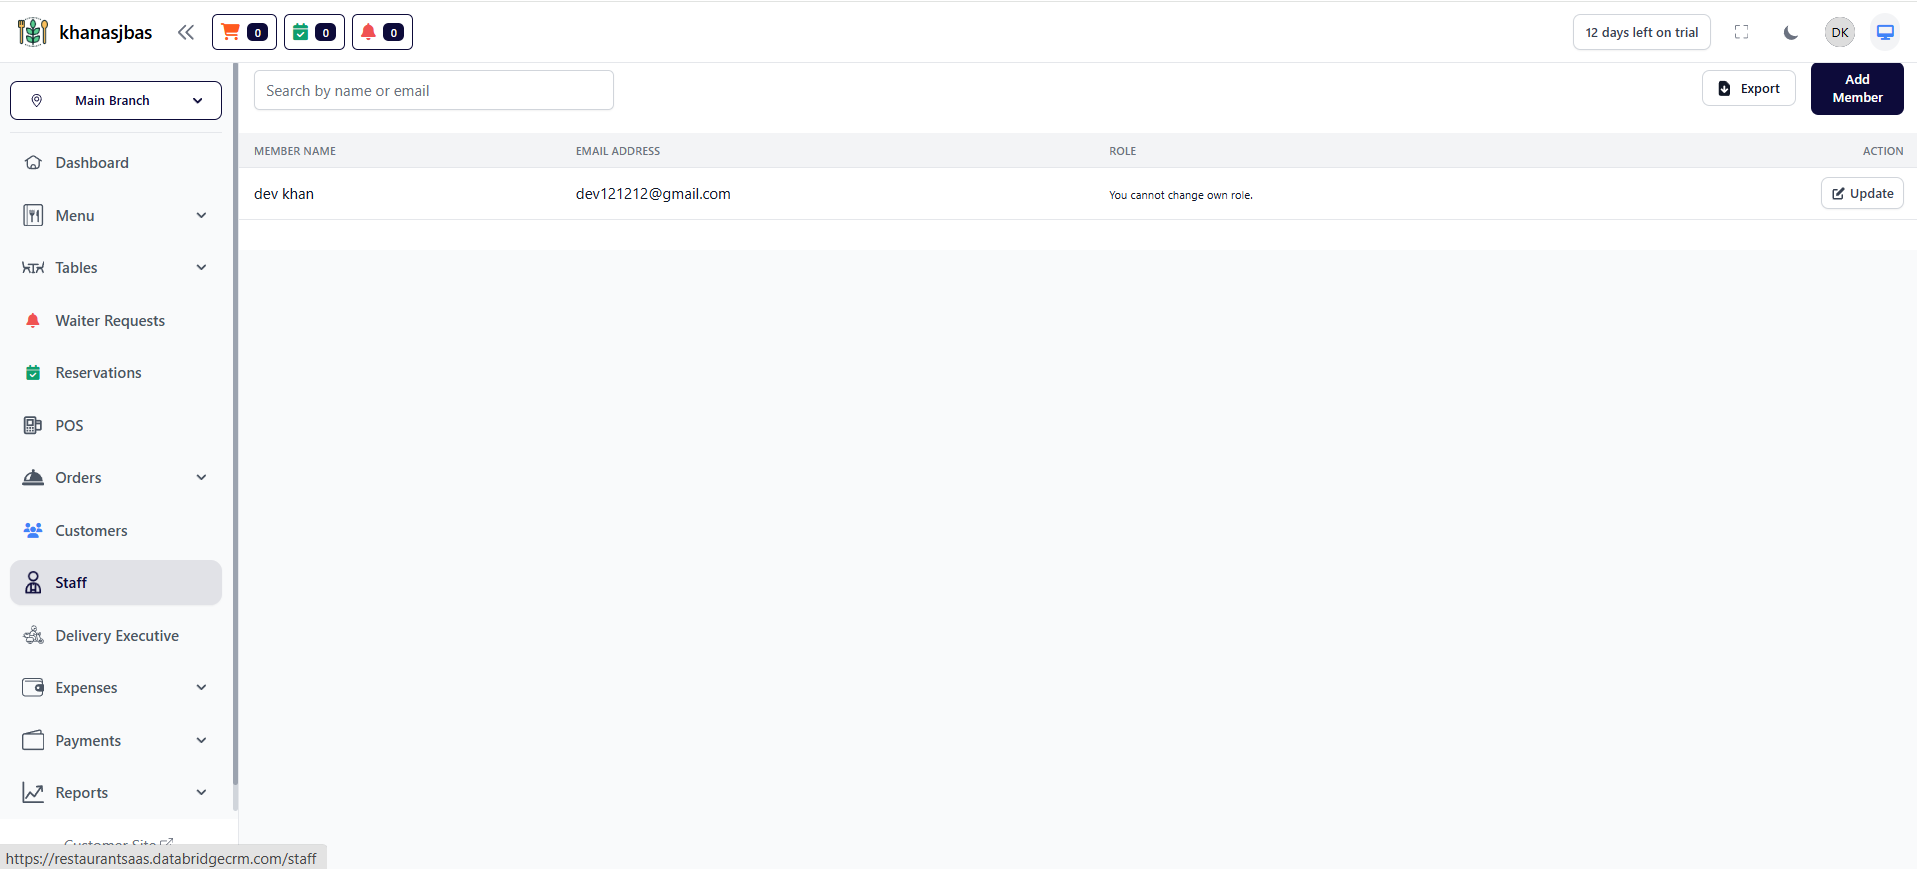
View Staff Members:
This section displays all added staff members in a list format.
Details Shown:
->Member Name
->Email Address
->Role
->Action (Update)
This section displays all added staff members in a list format.
Details Shown:
->Member Name
->Email Address
->Role
->Action (Update)
1
Dashboard
2
Staff
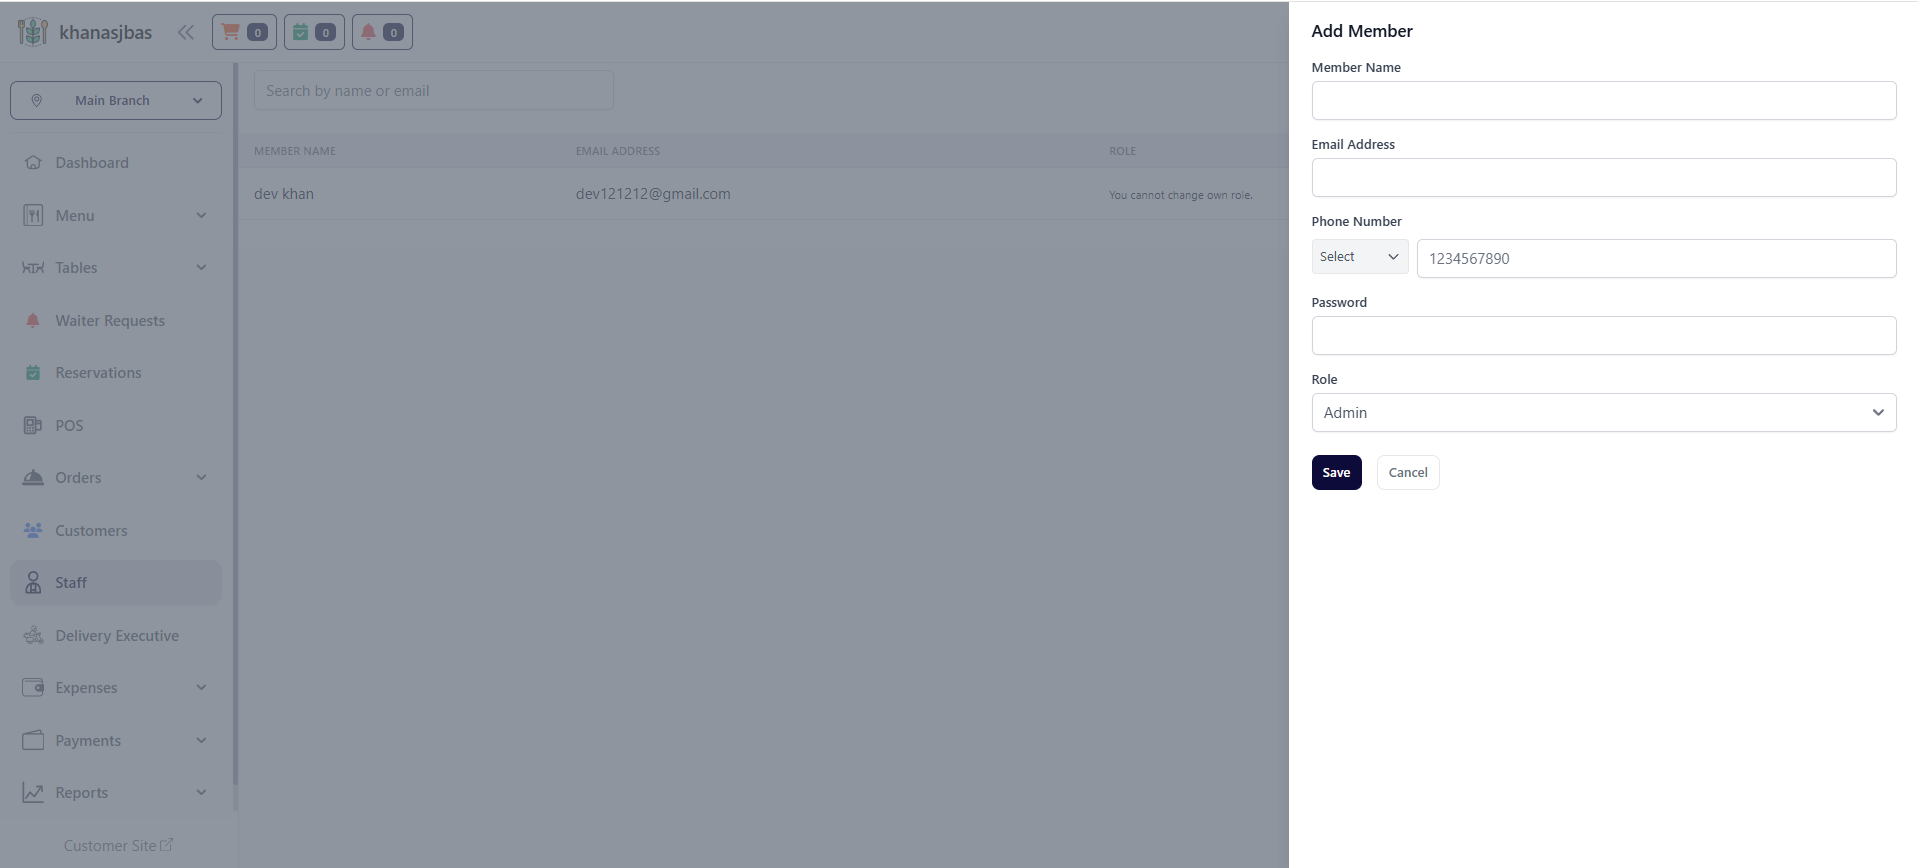
Add New Staff Member:
This feature allows the admin to add a new staff member by entering their personal and login details.
Fields in Add Member Form:
->Member Name:
Enter the full name of the staff member
->Email Address:
Used for login and communication
->Phone Number:
Contact number with country code
->Password:
Set login password for staff
->Role:
Assign role (e.g., Admin, Staff, Waiter, etc.)
1
Dashboard
2
Staff
3
Click "Add Member"
4
Fill Details
5
Save
Delivery Executive Management
The Delivery Executive feature allows the admin to manage delivery personnel responsible for delivering orders to customers.Using this feature, the admin can add new delivery executives, track their availability status, and assign them to delivery tasks. This ensures smooth order delivery operations and better coordination between kitchen, staff, and delivery team.
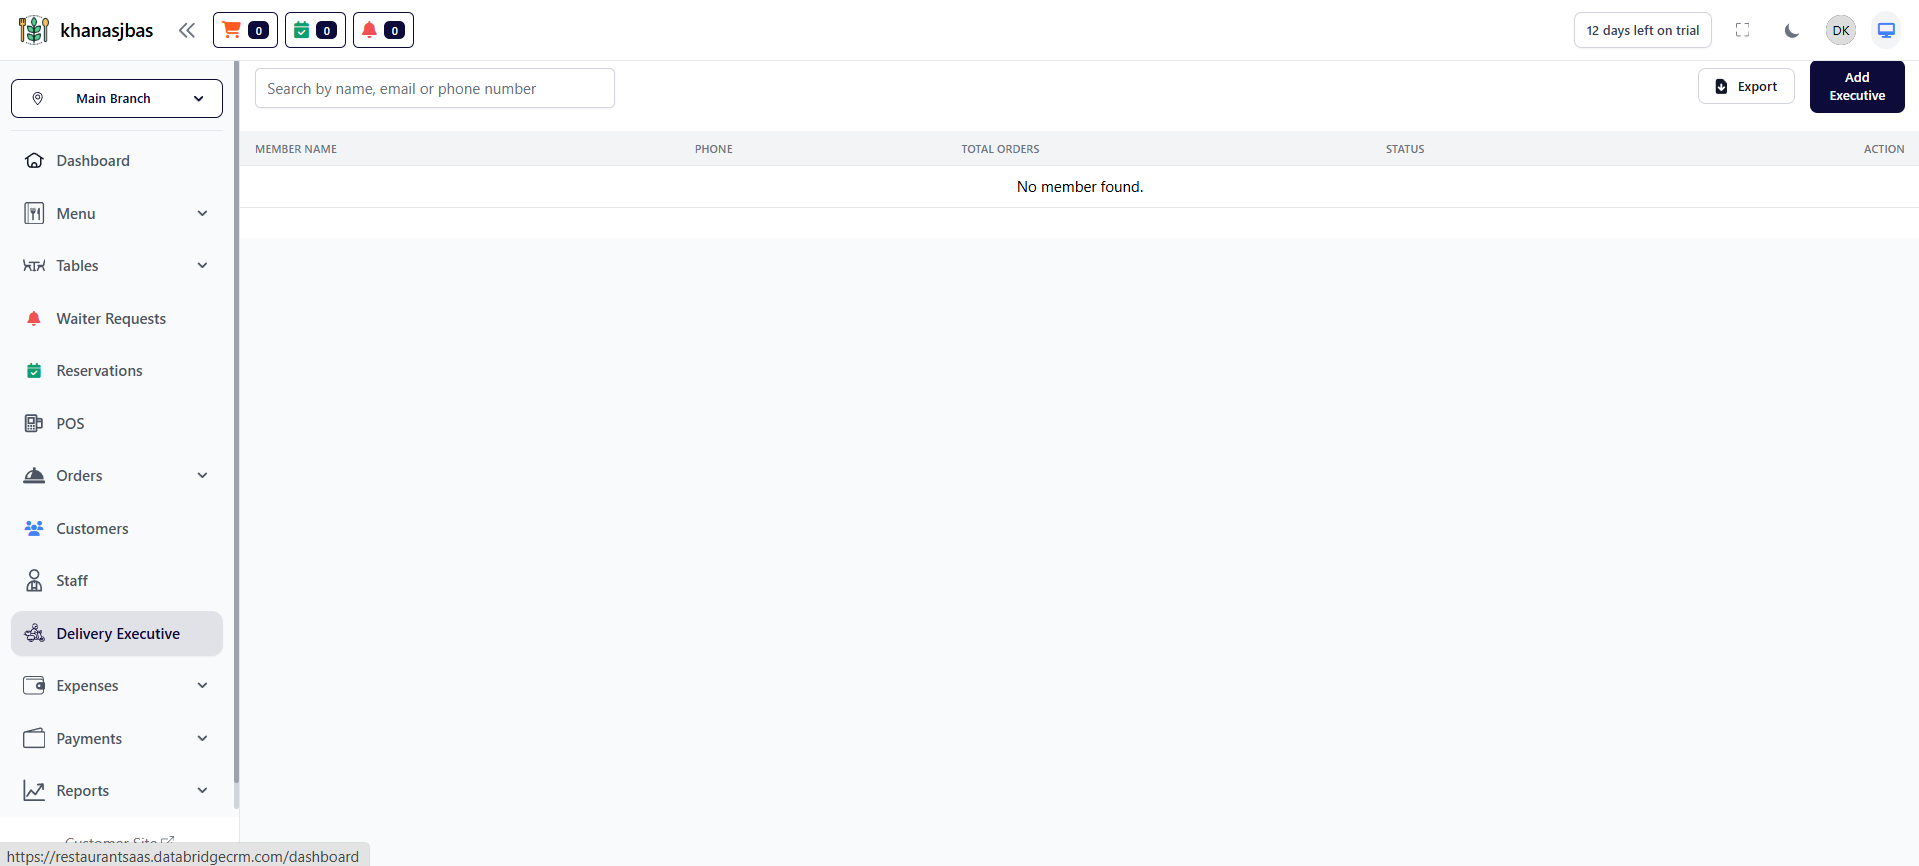
View Delivery Executives:
This section displays all delivery executives in a list format.
Details Shown:
-Member Name
-Phone Number
-Total Orders (handled by executive)
-Status (Available / Busy / Offline)
-Action (Update / Delete)
This section displays all delivery executives in a list format.
Details Shown:
-Member Name
-Phone Number
-Total Orders (handled by executive)
-Status (Available / Busy / Offline)
-Action (Update / Delete)
1
Dashboard
2
Delivery Executive
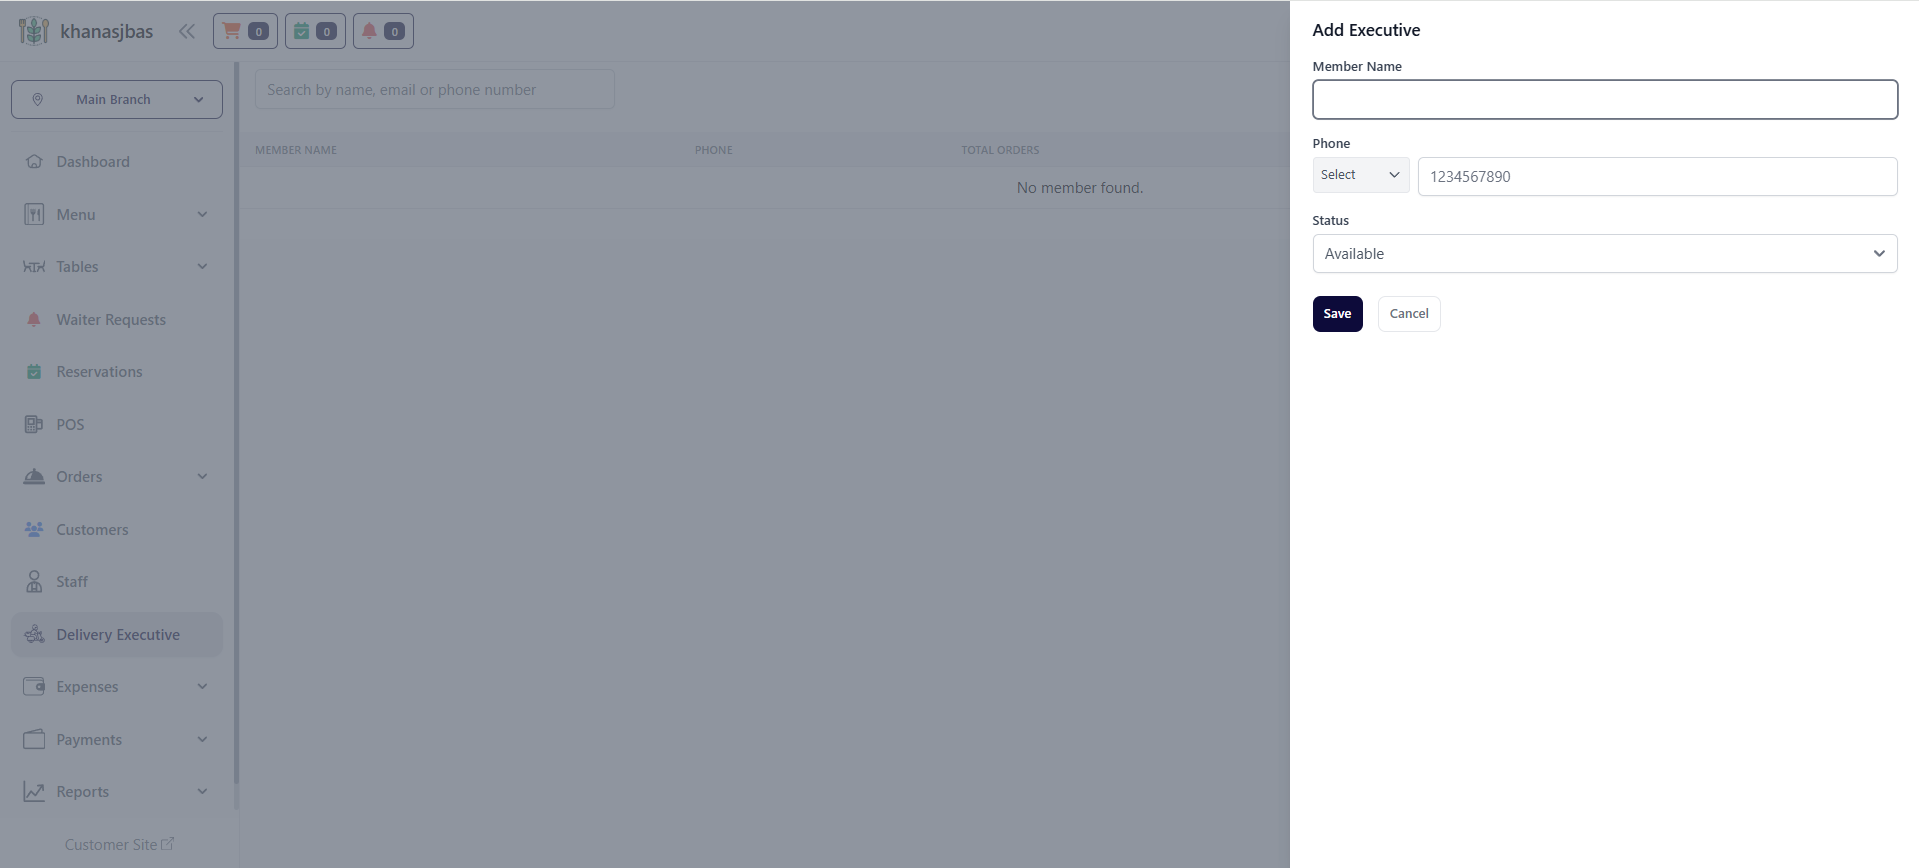
Add Delivery Executive:
This feature allows the admin to add a new delivery executive by entering basic details such as name, phone number, and availability status.
Fields in Add Executive Form:
->Member Name
Enter the name of the delivery executive
->Phone
Add contact number with country code
->Status
Select availability status (Available / Busy / Offline)
1
Dashboard
2
Delivery Executive
3
Click "Add Executive"
4
Fill Details
5
Save
Expense Management
The Expense Management feature allows the admin to track, record, and manage all business-related expenses in one place.This module helps in maintaining financial records such as daily expenses, payments, due amounts, and expense categories. It ensures better financial control, budgeting, and reporting for the business.
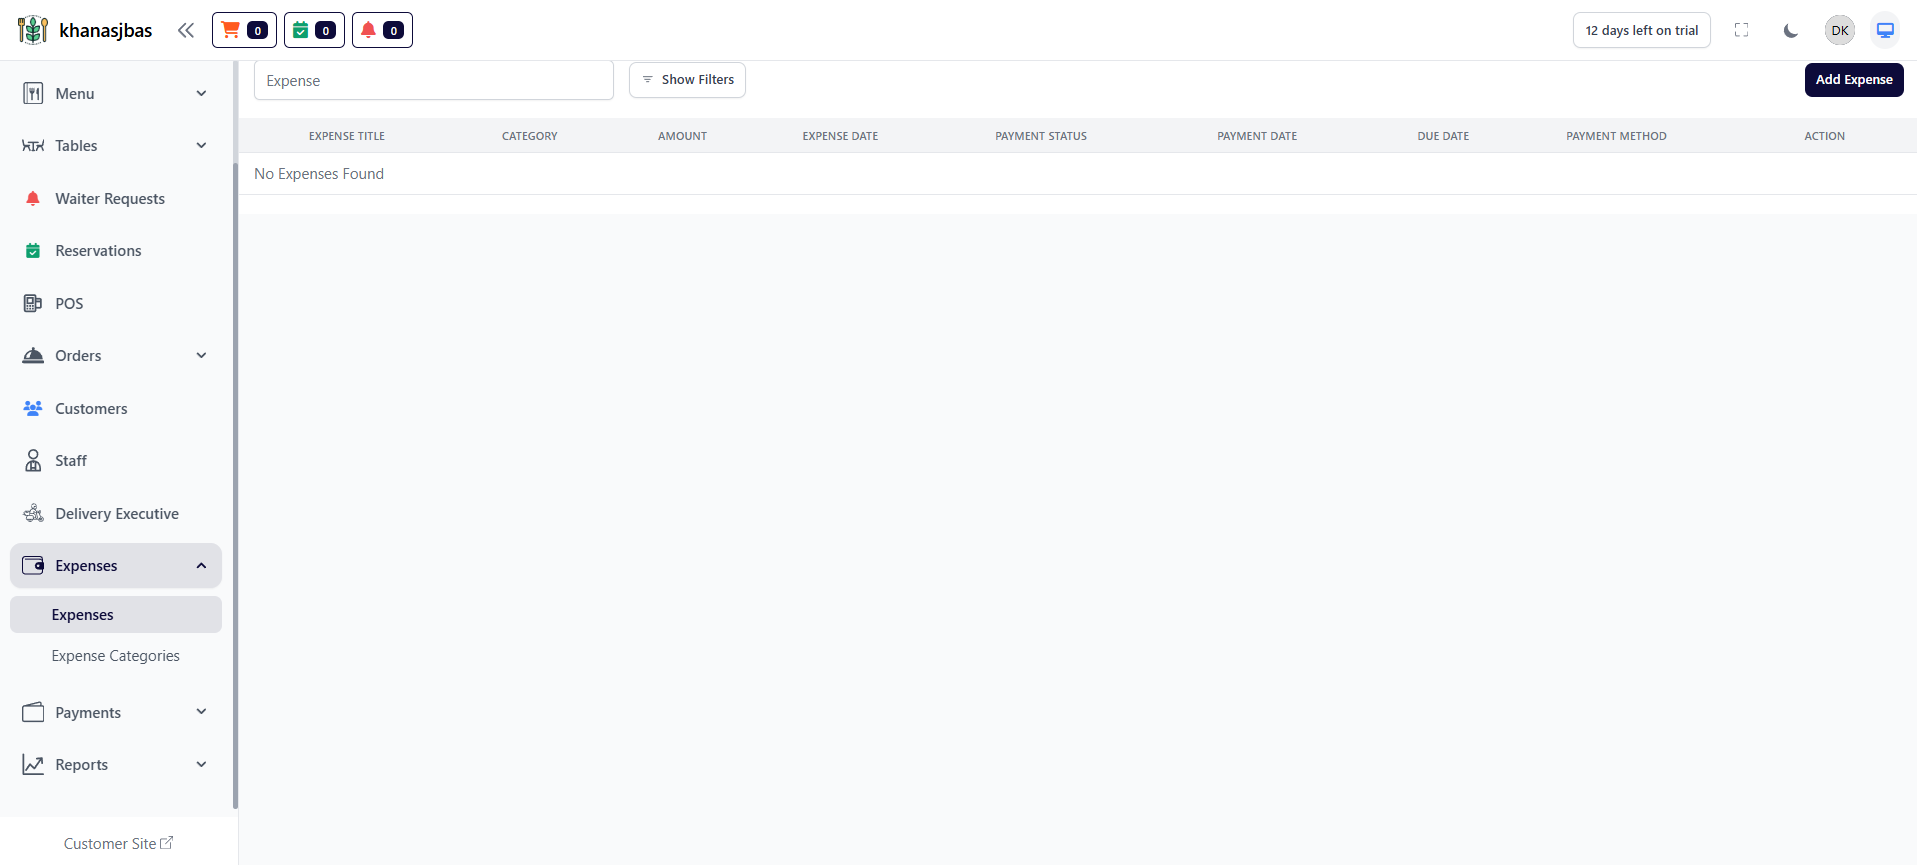
View Expenses:
Displays all added expenses in a structured table format.
Details Shown:
-Expense Title
-Category
-Amount
-Expense Date
-Payment Status
-Payment Date
-Due Date
-Payment Method
-Actions (Update/Delete)
Displays all added expenses in a structured table format.
Details Shown:
-Expense Title
-Category
-Amount
-Expense Date
-Payment Status
-Payment Date
-Due Date
-Payment Method
-Actions (Update/Delete)
1
Dashboard
2
Expenses
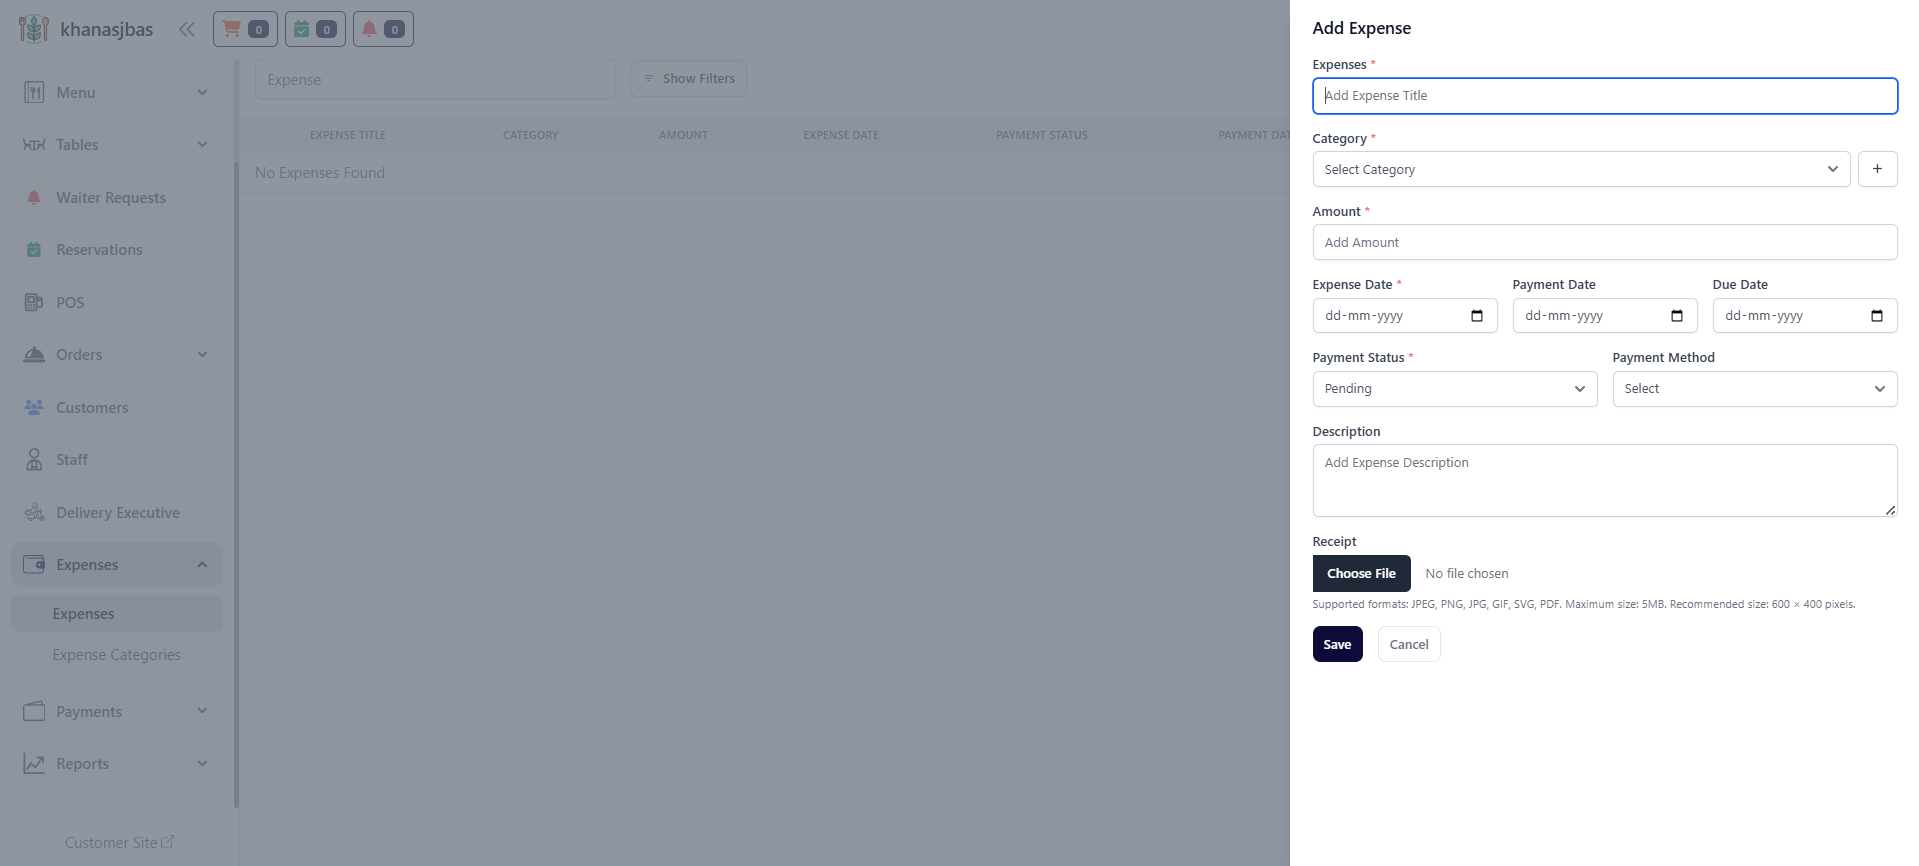
Add Expense:
This feature allows the admin to add a new expense with complete financial details including category, amount, dates, and payment status.
Fields in Add Expense Form:
->Expense Title
Name of the expense (e.g., Rent, Electricity Bill)
->Category
Select expense category (or create new using + button)
->Amount
Enter total expense amount
->Expense Date
Date when expense occurred
->Payment Date
Date when payment was made
->Due Date
Payment deadline
->Payment Status
Pending / Paid
->Payment Method
Cash / UPI / Card / etc.
->Description
Additional notes about expense
->Receipt Upload
Upload bill/receipt for record.
1
Dashboard
2
Expenses
3
Click "Add Expense"
4
Fill Details
5
Save
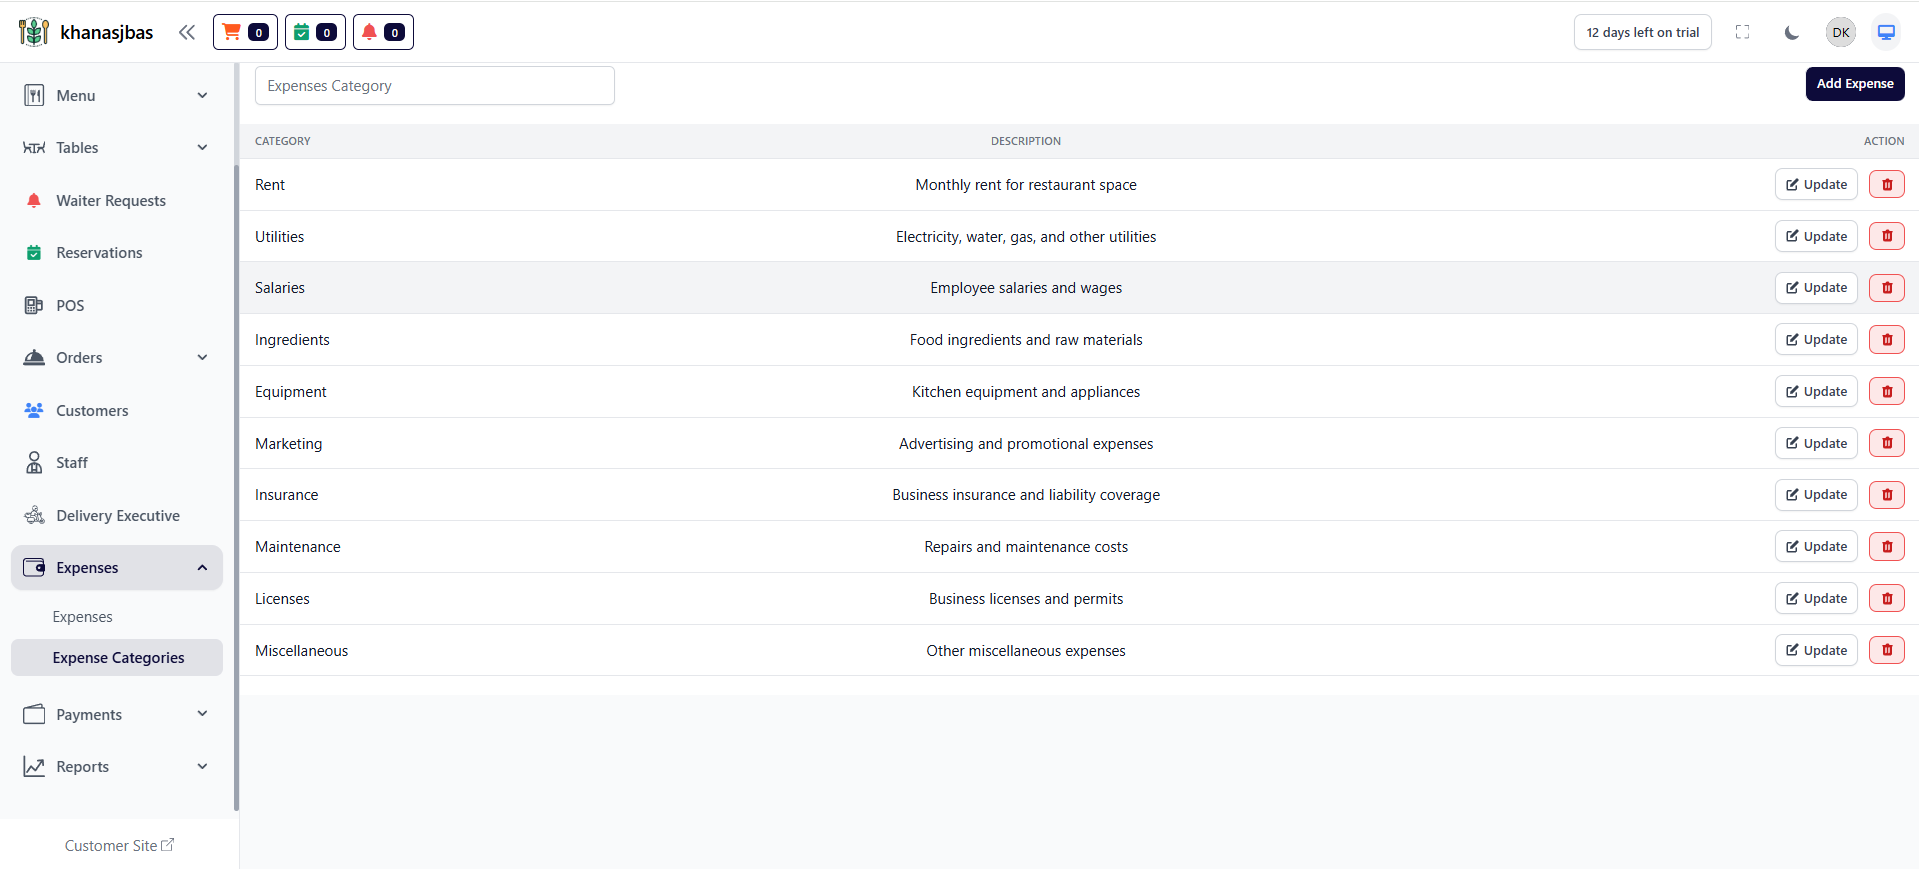
Expense Categories:
This feature allows the admin to organize expenses into different categories for better tracking and reporting.
This feature allows the admin to organize expenses into different categories for better tracking and reporting.
1
Dashboard
2
Expense Categories
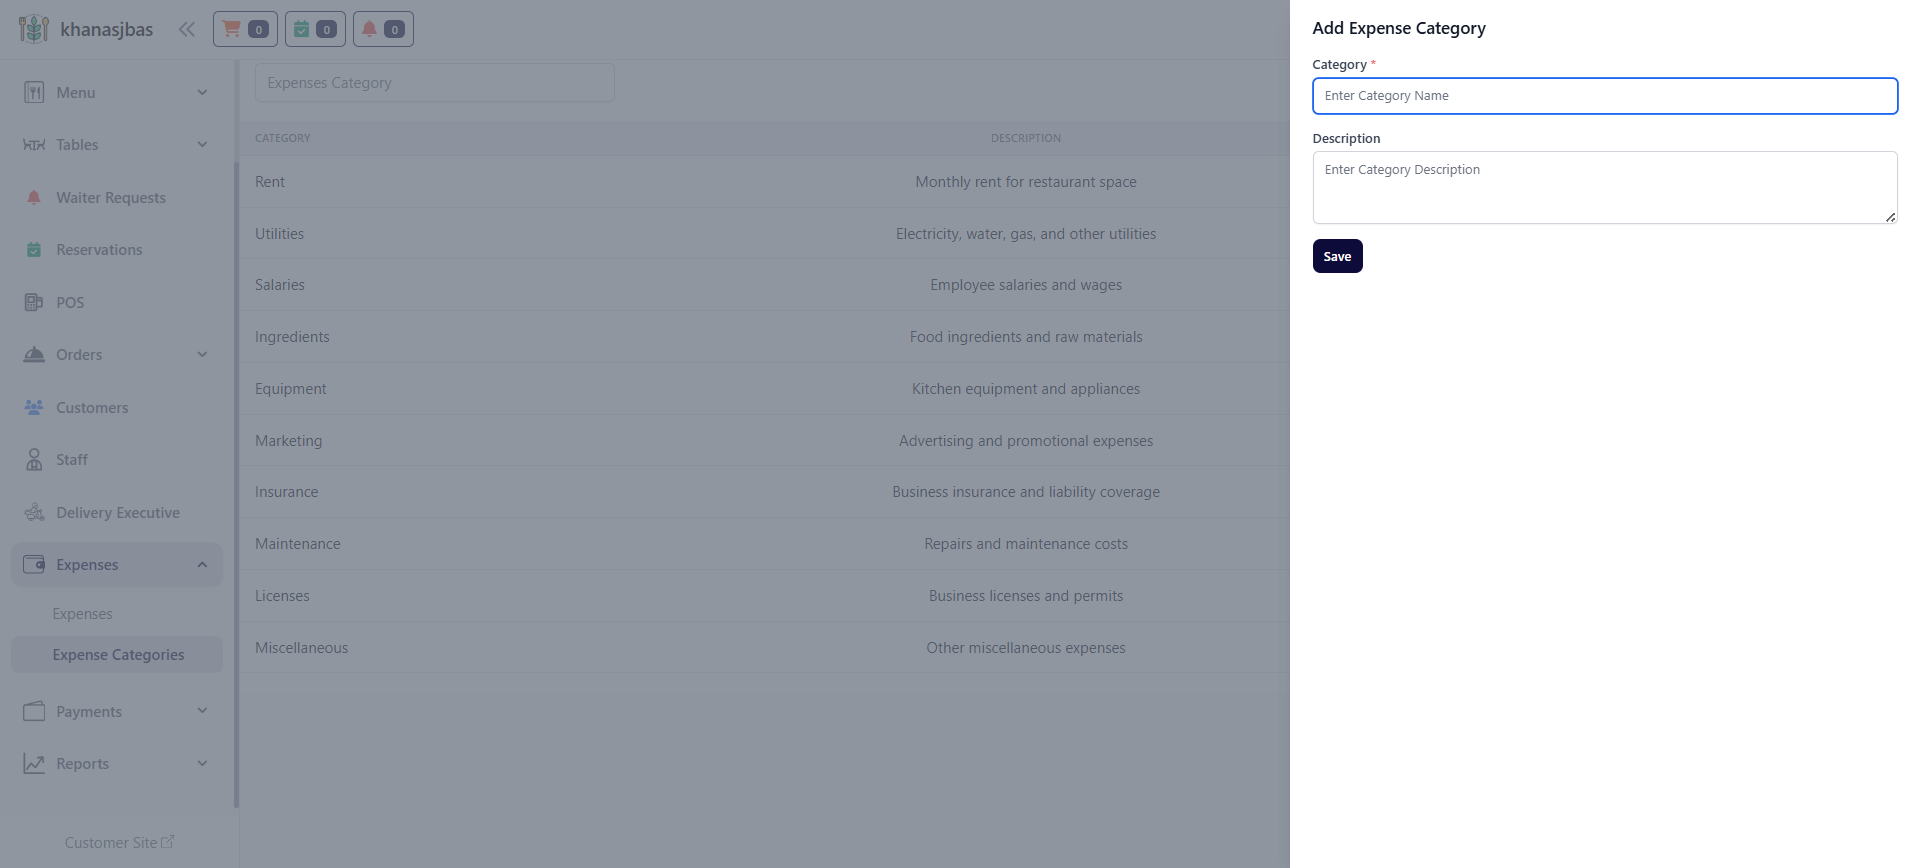
Add Expense Category:
Allows admin to create custom categories for organizing expenses.
Fields:
->Category Name
Name of category
->Description
Details about category
Allows admin to create custom categories for organizing expenses.
Fields:
->Category Name
Name of category
->Description
Details about category
1
Expense Categories
2
Add Category
3
Fill Details
4
Save
Update / Delete Expense Category:
->Update category name or description
->Delete unused categories
->Update category name or description
->Delete unused categories
1
Expense Categories
2
Click Update/Delete
Payment Management
The Payment Management module allows the admin to track all incoming payments made against orders.It helps in maintaining transaction records, verifying payments, and monitoring pending or due payments to ensure smooth financial operations.
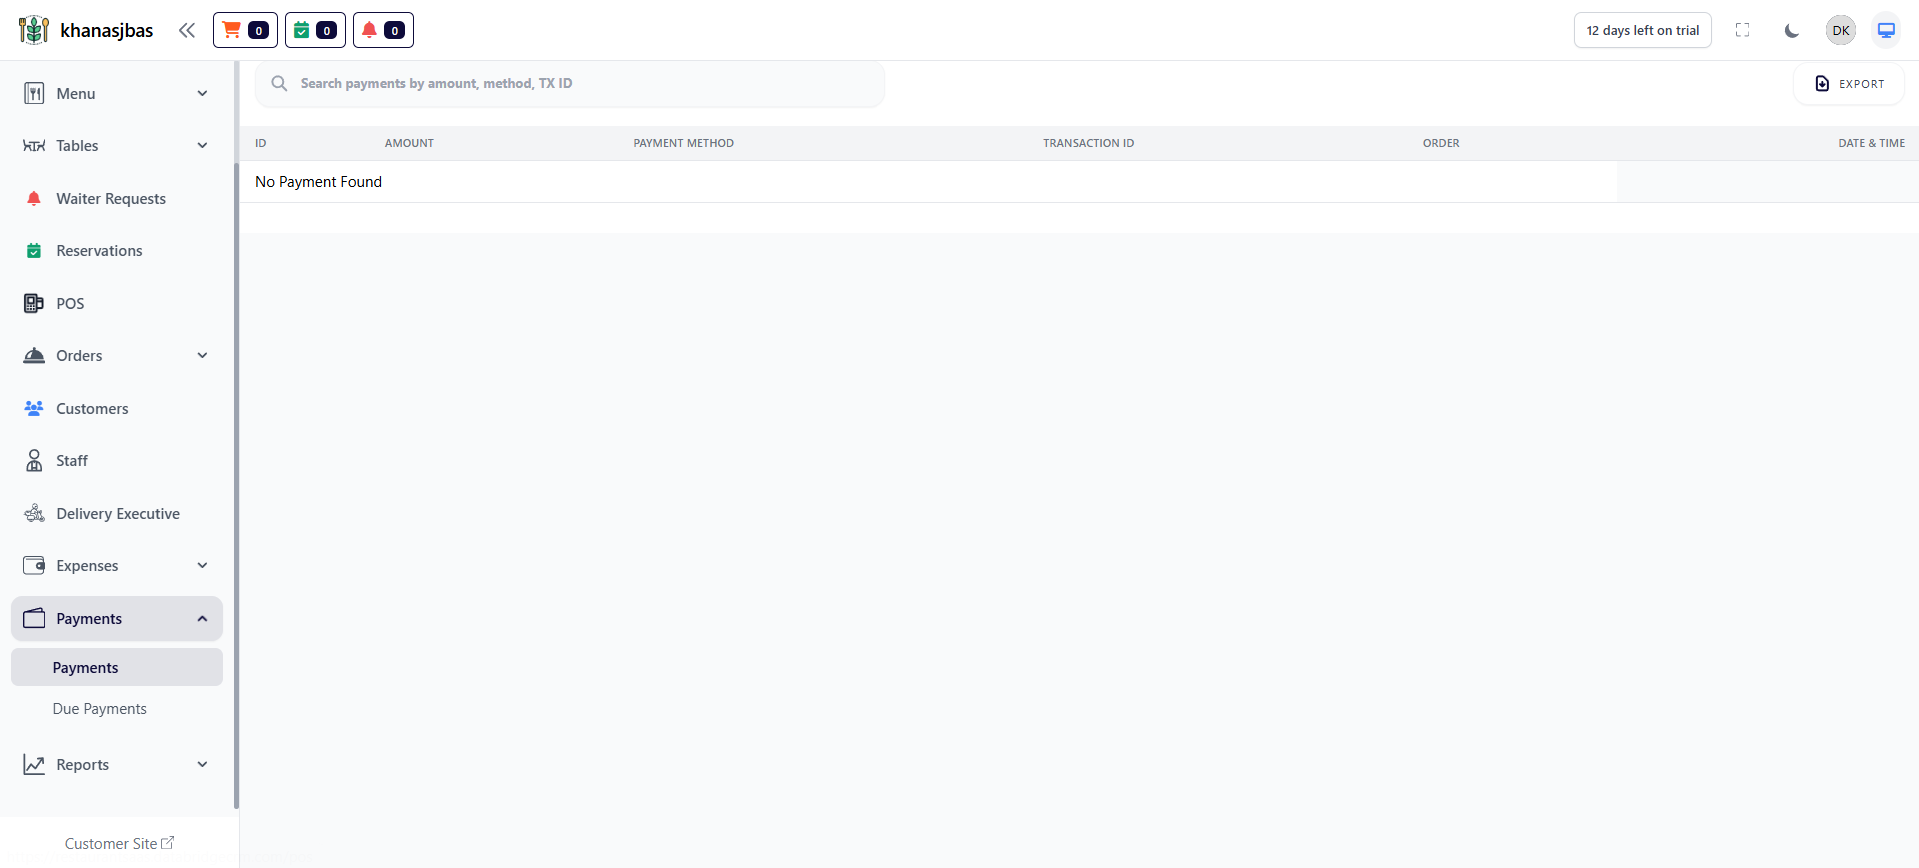
Payments:
This section displays all successfully completed payment transactions linked with orders.
Details Shown:
-ID → Unique payment ID
-Amount → Total paid amount
-Payment Method → Cash / UPI / Card / etc.
-Transaction ID → Payment reference number
-Order → Linked order number
-Date & Time → Payment timestamp
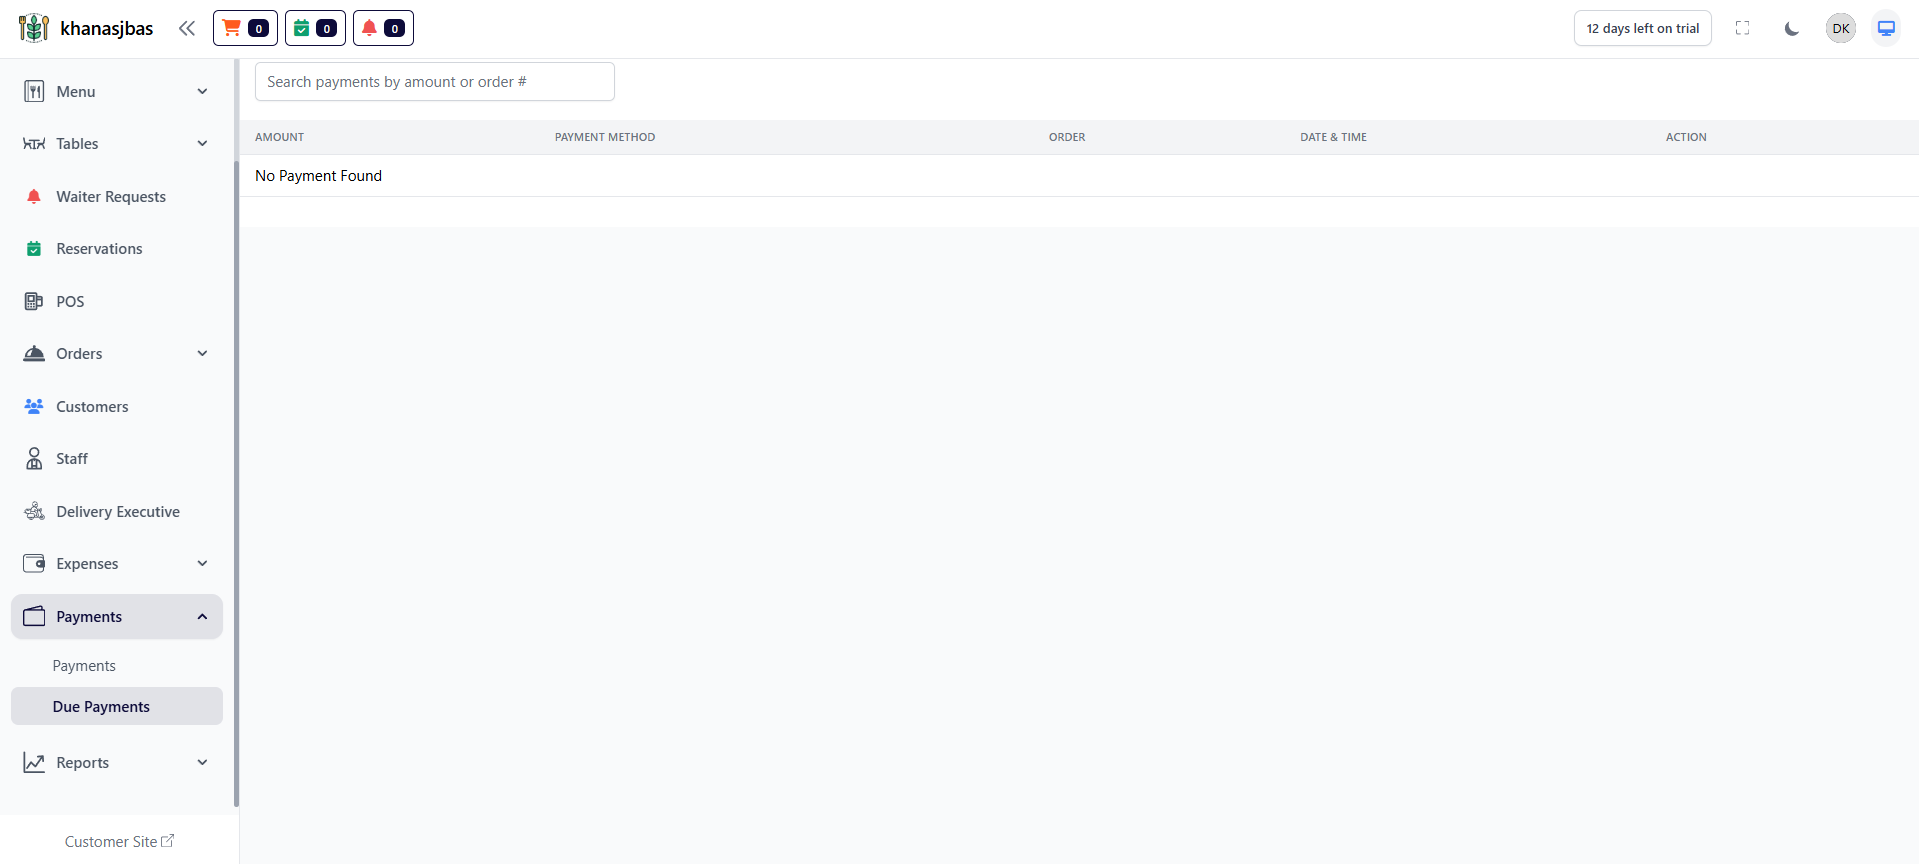
Due Payments:
This section shows all pending or unpaid payments that are linked to orders but not yet completed.
Details Shown:
-Amount → Pending amount
-Payment Method → Expected method
-Order → Linked order
-Date & Time → Order/payment creation time
-Action → Mark as paid / manage
Features:
-Search Bar
→ Search due payments by amount or order number
1
Dashboard
2
Payments
3
Due Payments
Reports & Analytics Dashboard
The Reports Module provides detailed analytics of restaurant operations including sales, items, categories, delivery apps, expenses, cancellations, and taxes.It helps the admin to track performance, analyze trends, and make data-driven decisions for business growth.

Sales Report:
Provides a complete overview of total sales, payment methods, taxes, and outstanding payments within a selected time range.
Key Metrics:
-Total Sales → Overall revenue
-Total Orders → Number of orders
-Payment Methods → Cash, UPI, Card, Bank Transfer
-Payment Gateway → Online transactions
-Additional Amounts → Charges, Taxes, Discount, Tip
-Outstanding Payments → Pending payments
1
Dashboard
2
Reports
3
Sales Report
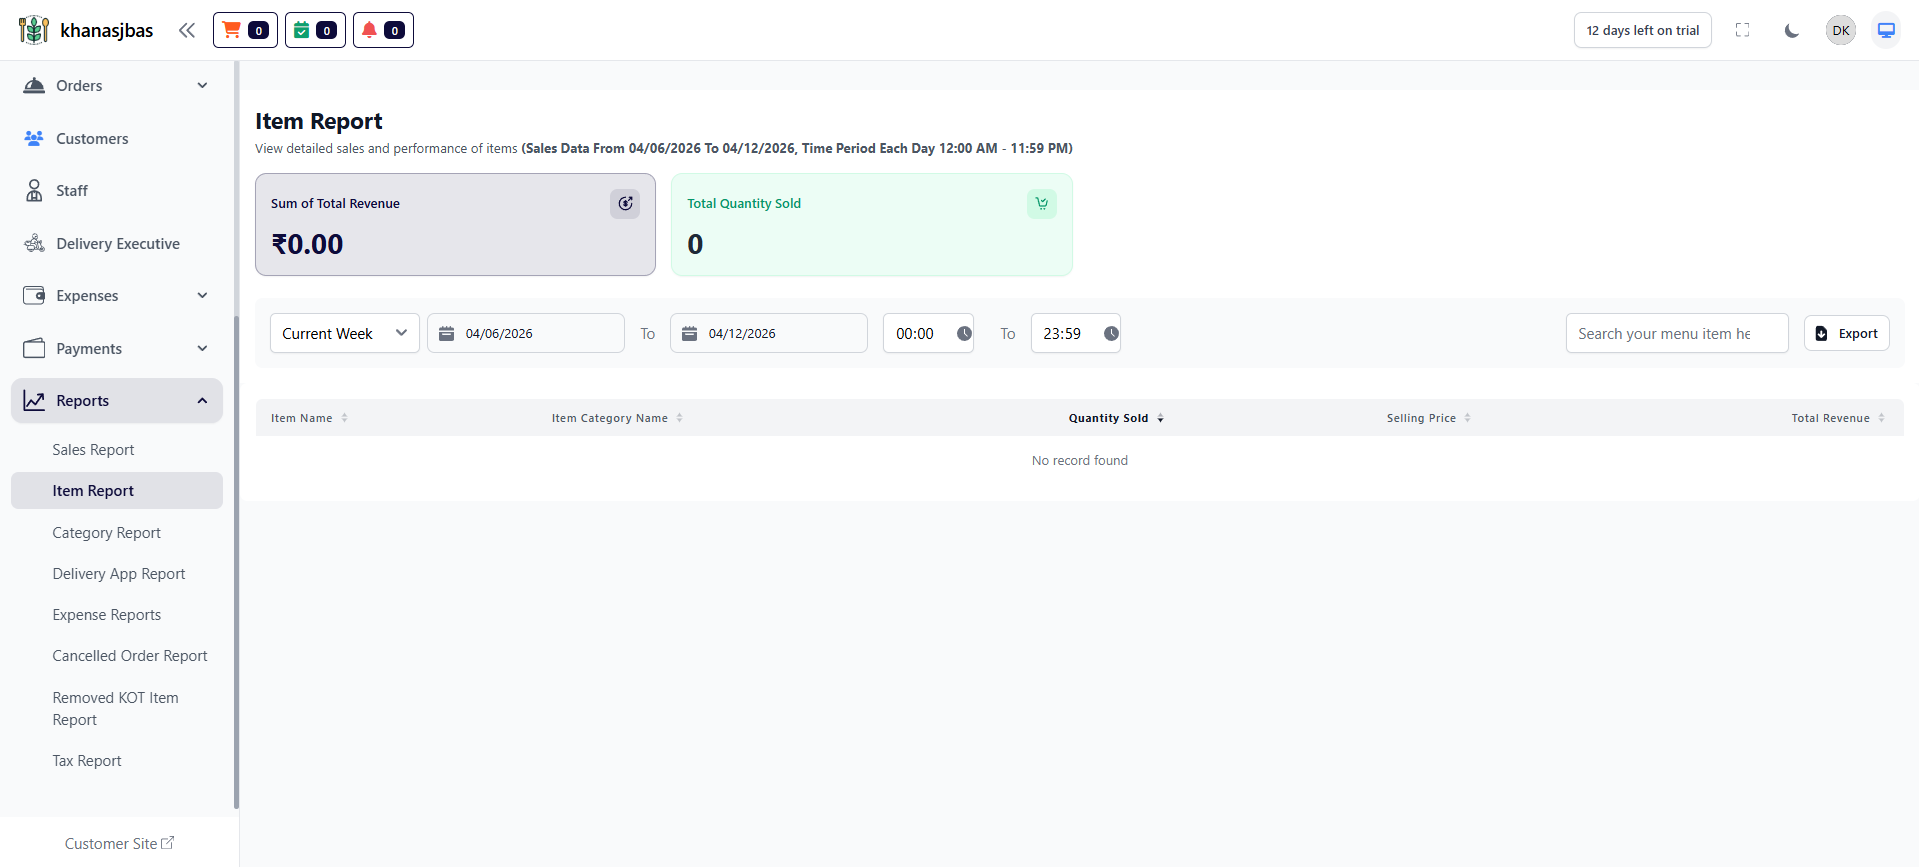
Item Report:
Shows performance of individual menu items including quantity sold and revenue generated.
Shows performance of individual menu items including quantity sold and revenue generated.
1
Reports
2
Item Report
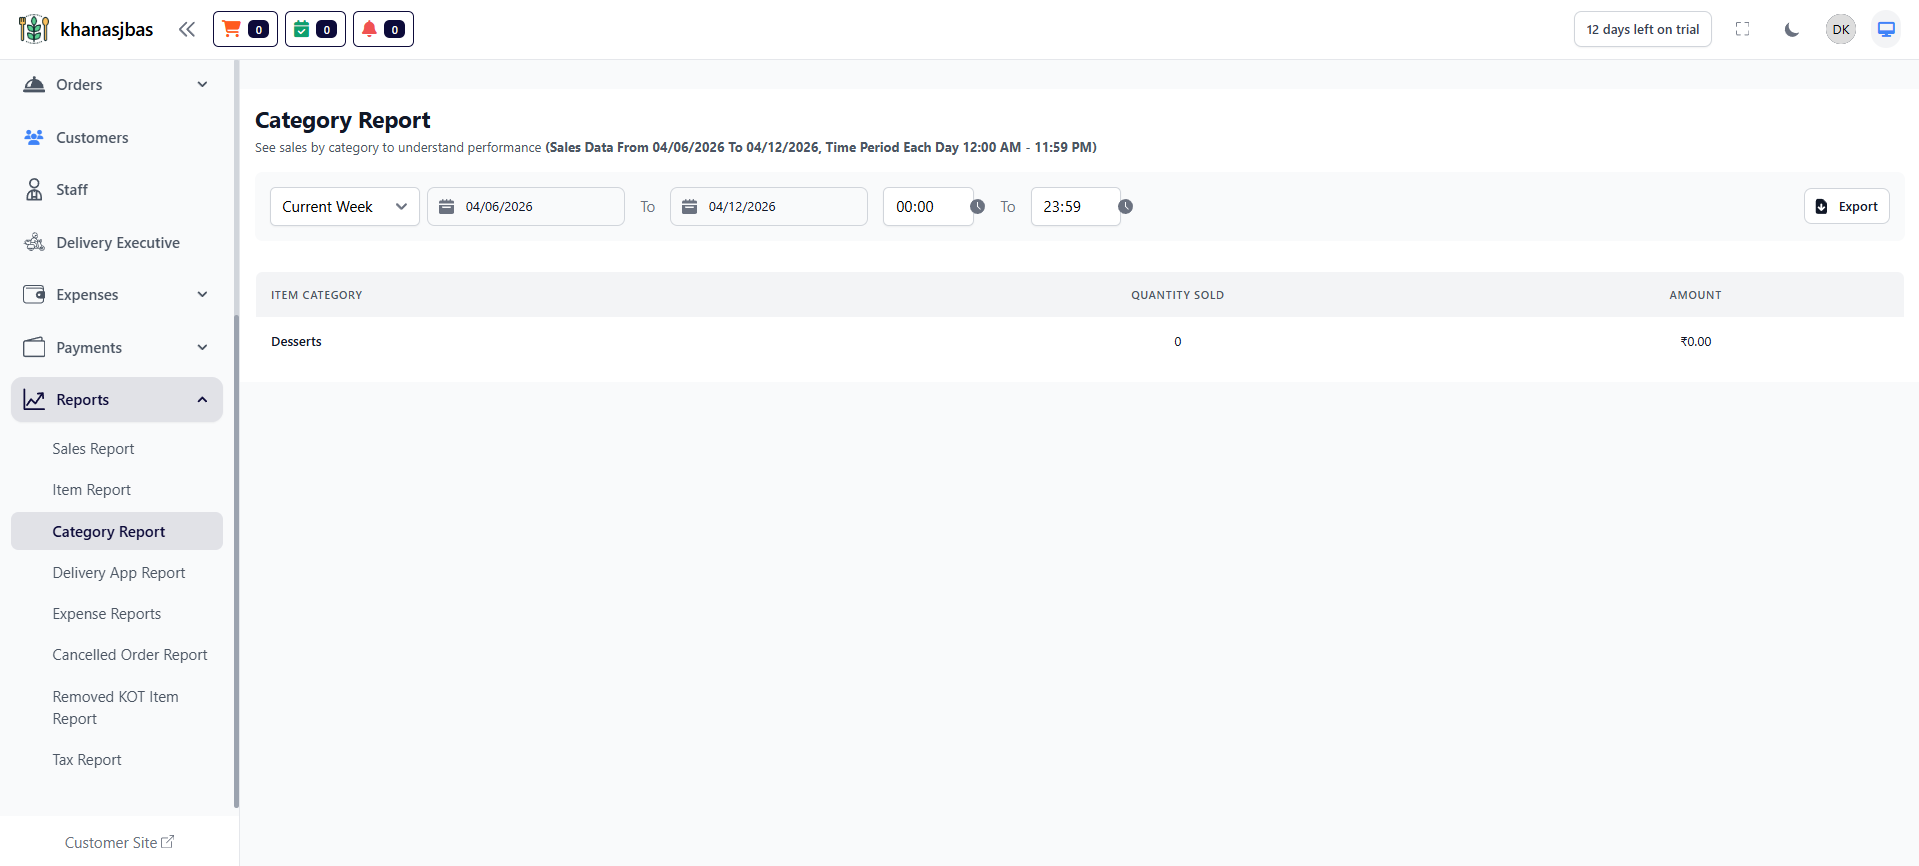
Category Report:
Displays sales data grouped by item categories.
Key Metrics:
-Category Name
-Quantity Sold
-Total Revenue
Displays sales data grouped by item categories.
Key Metrics:
-Category Name
-Quantity Sold
-Total Revenue
1
Reports
2
Category Report
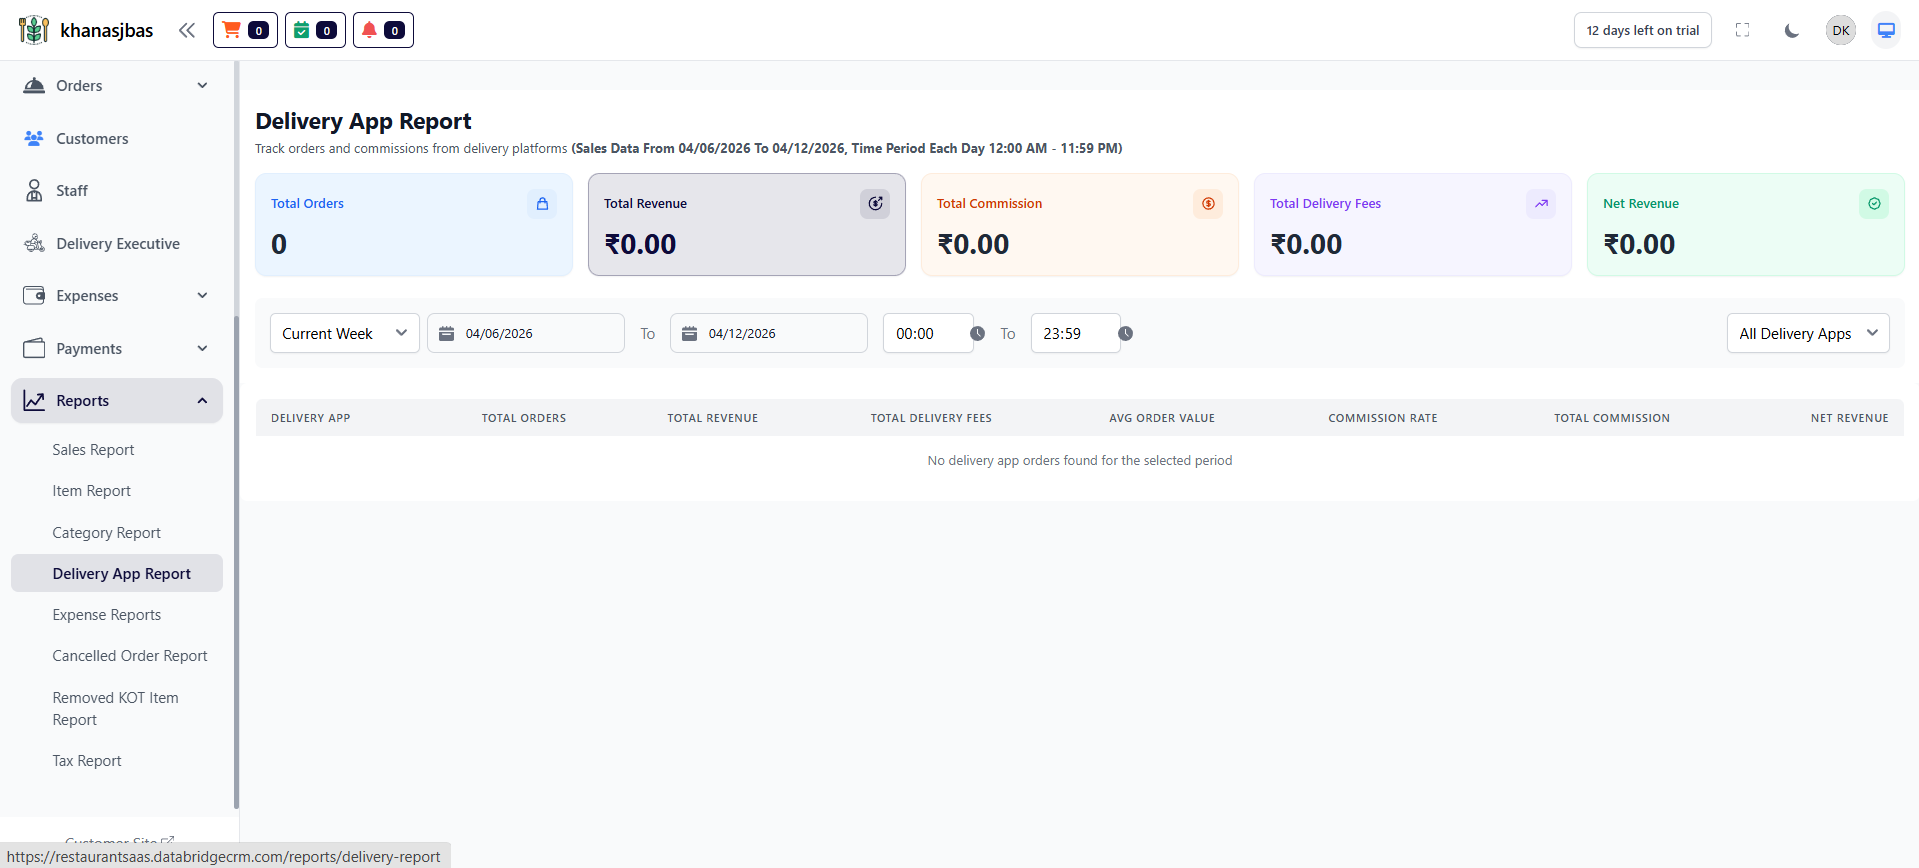
Delivery App Report:
Tracks orders and earnings from delivery platforms like Swiggy, Zomato, etc.
Key Metrics:
-Total Orders
-Total Revenue
-Total Commission
-Delivery Fees
-Net Revenue
Tracks orders and earnings from delivery platforms like Swiggy, Zomato, etc.
Key Metrics:
-Total Orders
-Total Revenue
-Total Commission
-Delivery Fees
-Net Revenue
1
Reports
2
Delivery App Report
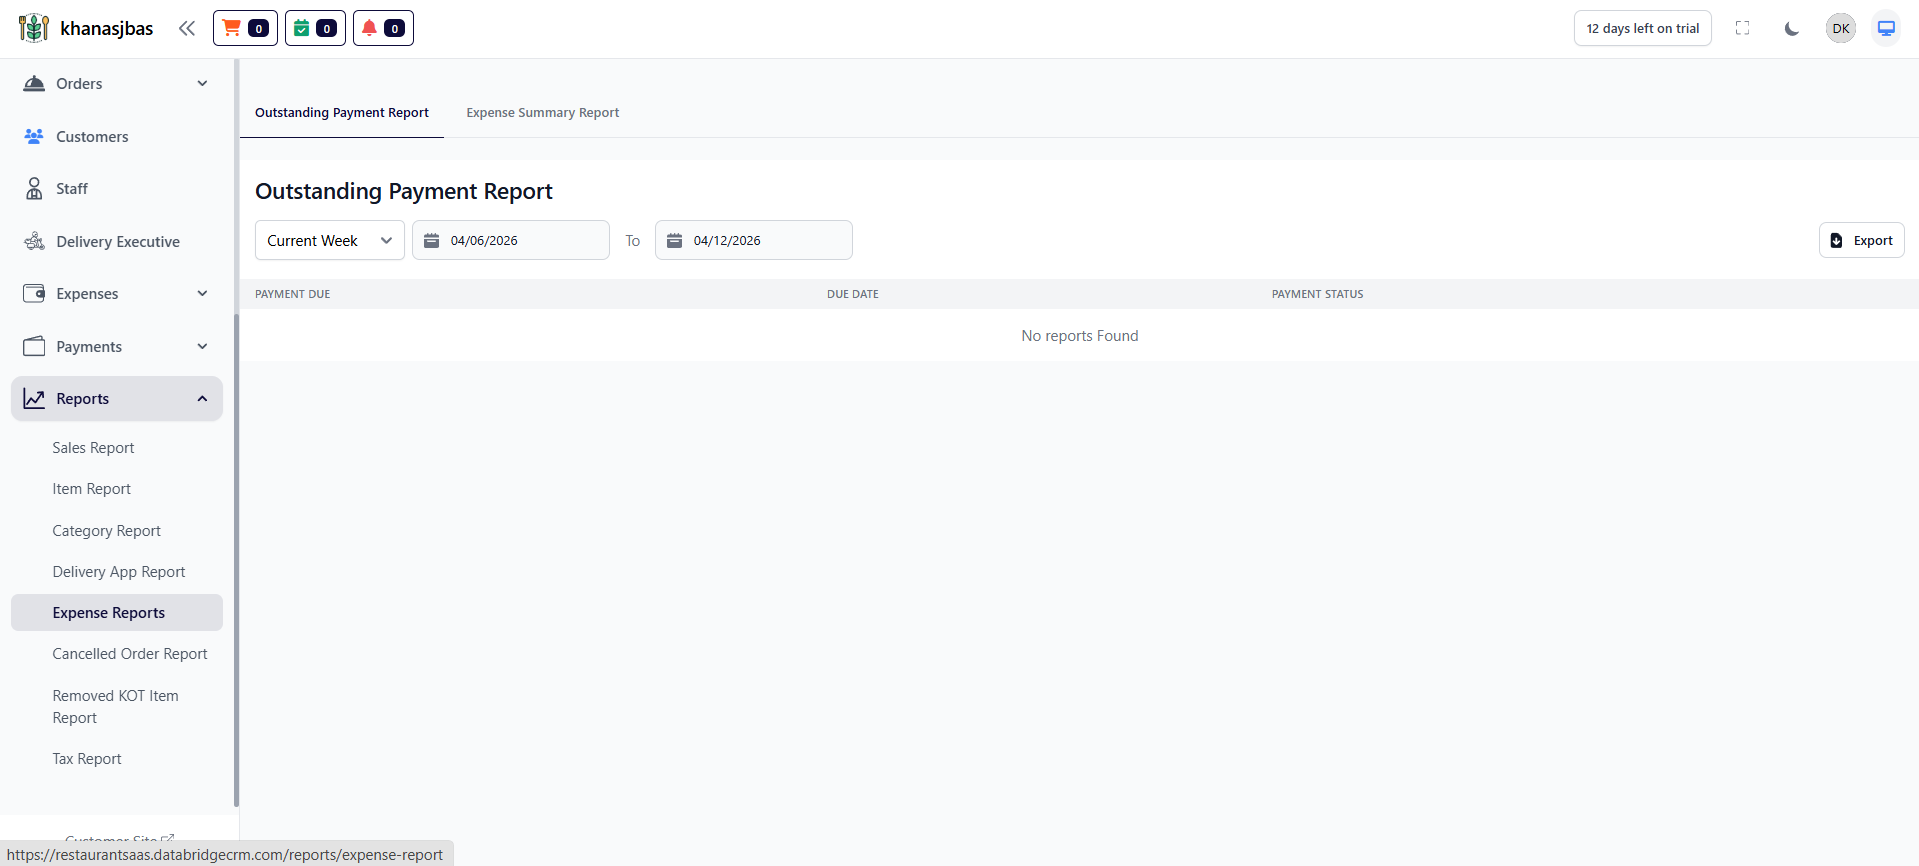
Expense Reports:
Tracks all expenses and outstanding payments related to business operations.
Sections
🔹 Outstanding Payment Report
-Pending expense payments
-Due date tracking
-Payment status
🔹 Expense Summary
-Overall expense overview
-Category-wise breakdown
Tracks all expenses and outstanding payments related to business operations.
Sections
🔹 Outstanding Payment Report
-Pending expense payments
-Due date tracking
-Payment status
🔹 Expense Summary
-Overall expense overview
-Category-wise breakdown
1
Reports
2
Expense Reports
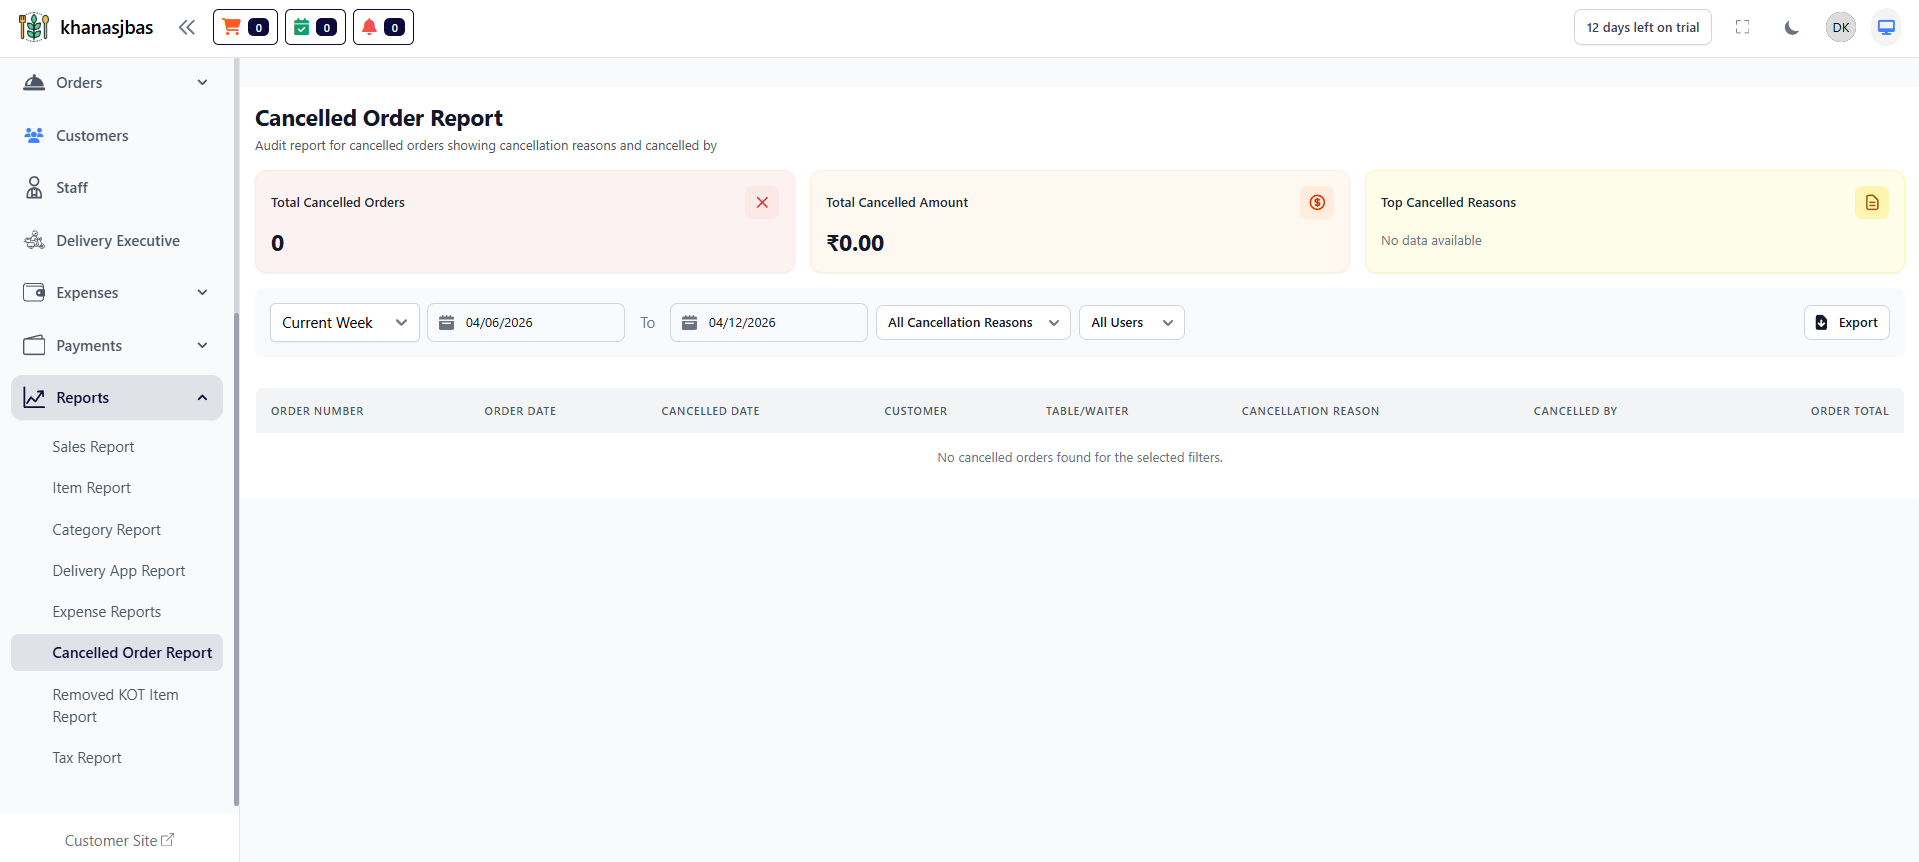
Cancelled Order Report:
Displays details of cancelled orders including reasons and responsible users.
Key Metrics
-Total Cancelled Orders
-Total Cancelled Amount
-Cancellation Reasons
-Cancelled By (Staff/User)
Displays details of cancelled orders including reasons and responsible users.
Key Metrics
-Total Cancelled Orders
-Total Cancelled Amount
-Cancellation Reasons
-Cancelled By (Staff/User)
1
Reports
2
Cancelled Order Report
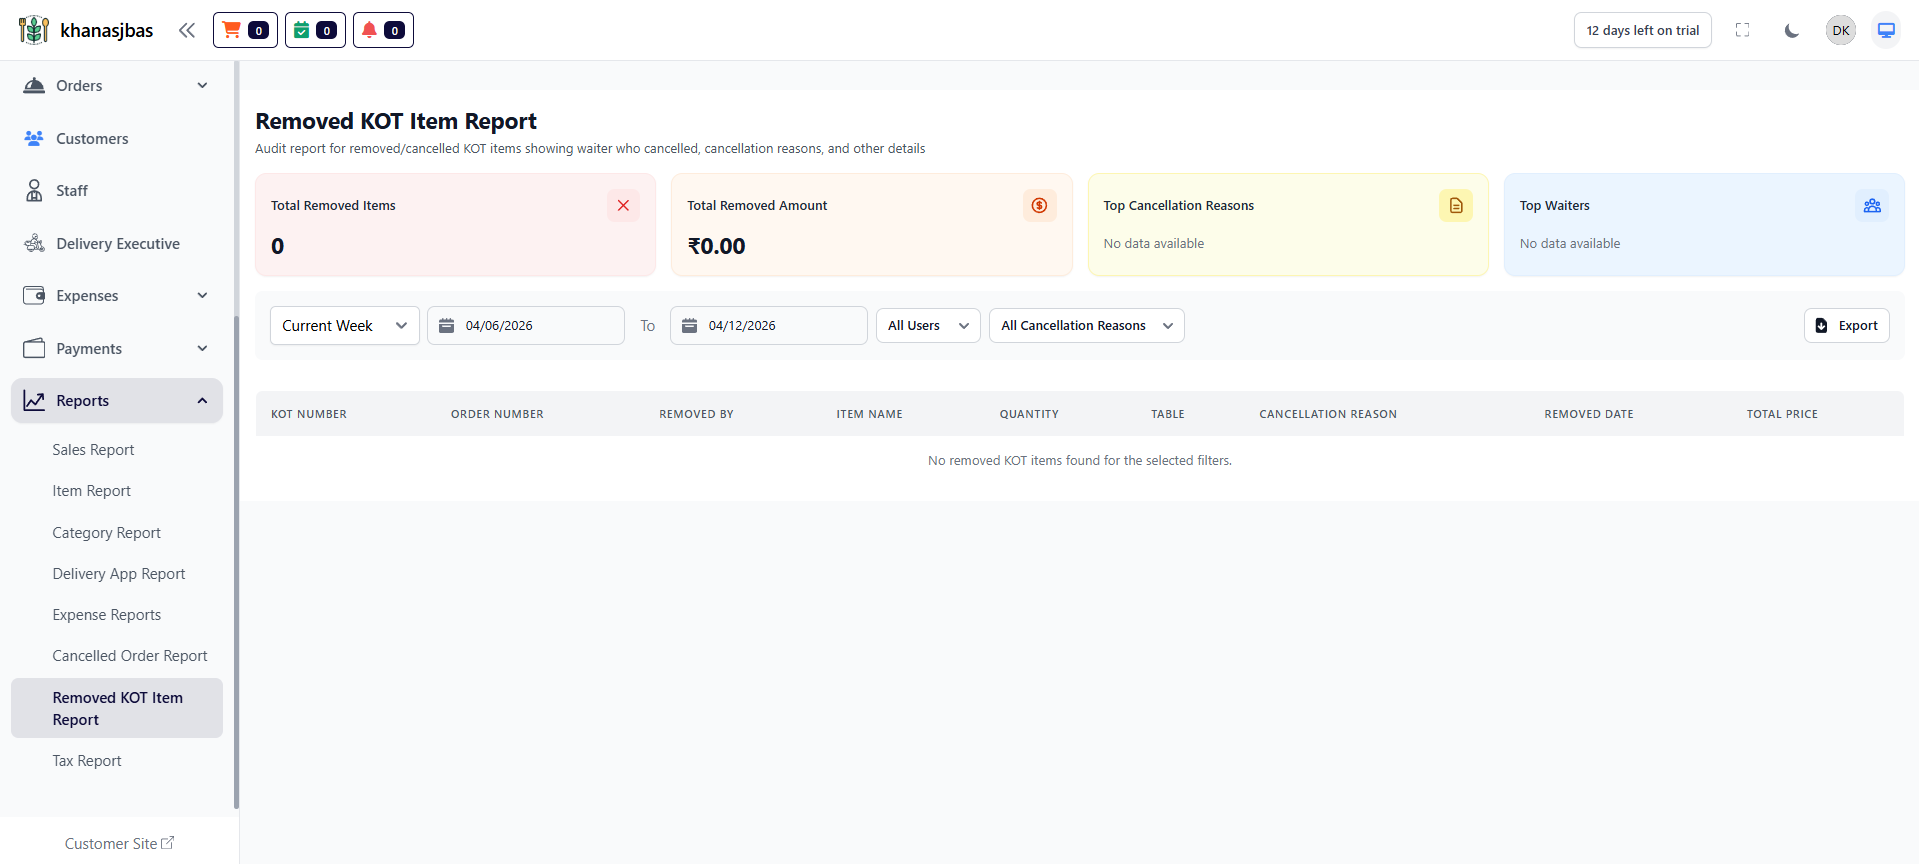
Removed KOT Item Report:
Tracks items removed from orders after being placed (important for kitchen audit).
Key Metrics:
-Total Removed Items
-Removed Amount
-Removed By (Waiter/Staff)
-Cancellation Reasons
Tracks items removed from orders after being placed (important for kitchen audit).
Key Metrics:
-Total Removed Items
-Removed Amount
-Removed By (Waiter/Staff)
-Cancellation Reasons
1
Reports
2
Removed KOT Item Report
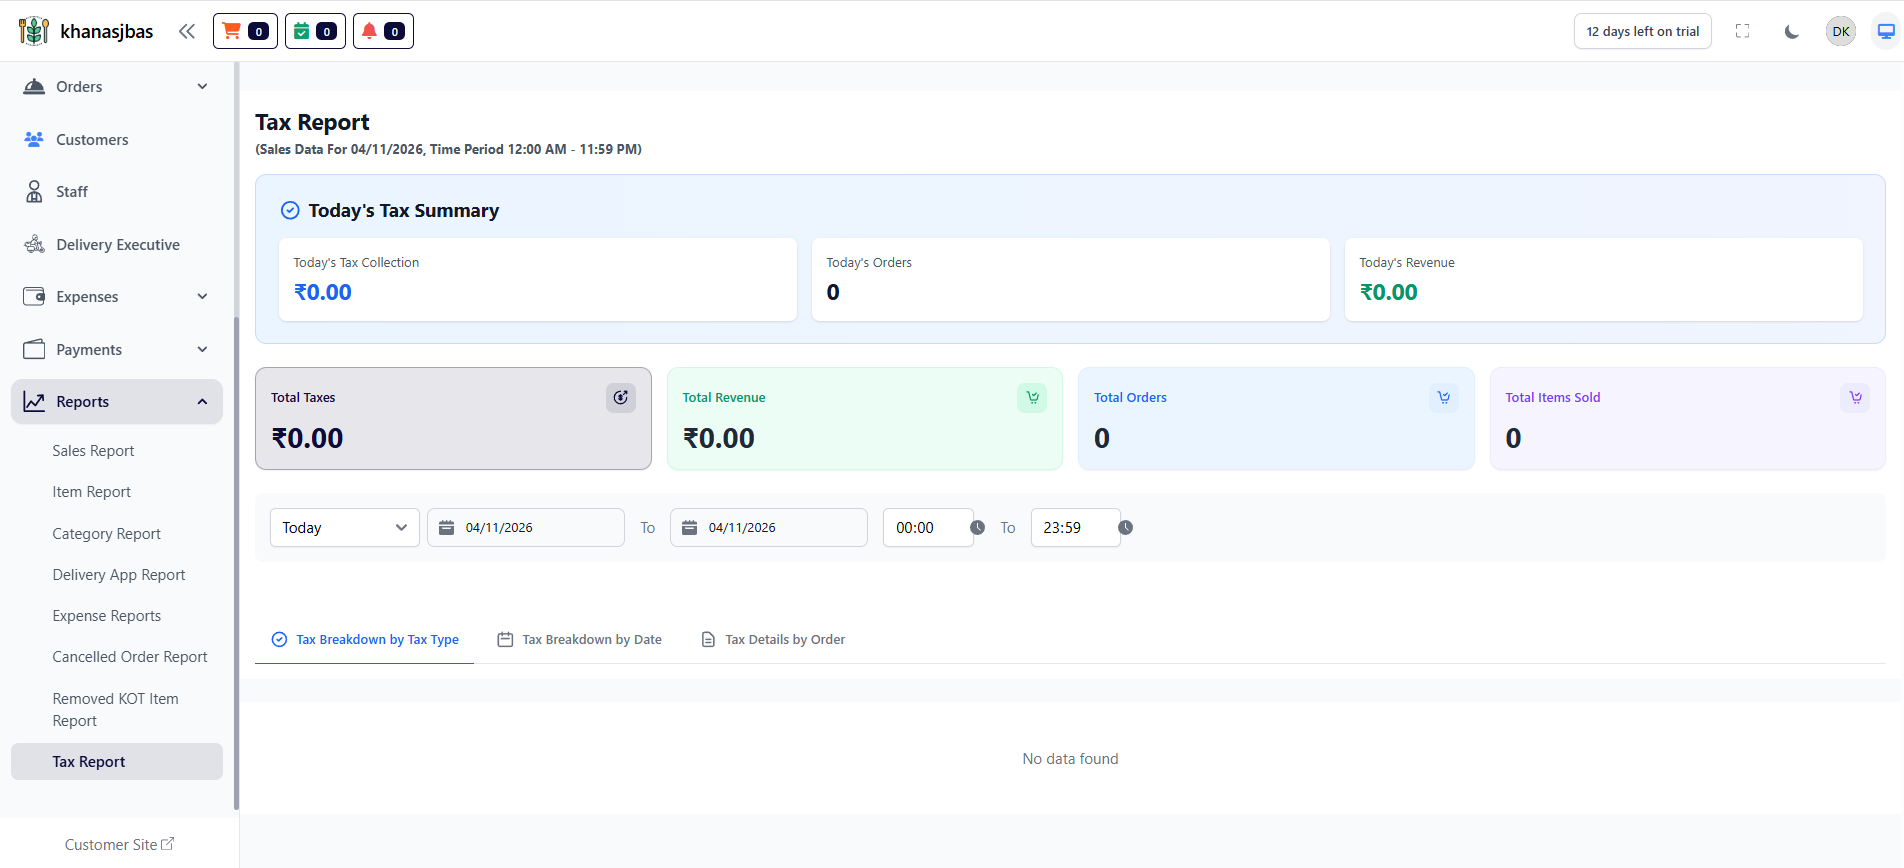
Tax Report:
Provides detailed insights into tax collection and revenue.
Key Metrics:
-Today's Tax Collection
-Total Revenue
-Total Orders
-Total Items Sold
Provides detailed insights into tax collection and revenue.
Key Metrics:
-Today's Tax Collection
-Total Revenue
-Total Orders
-Total Items Sold
1
Reports
2
Tax Report